
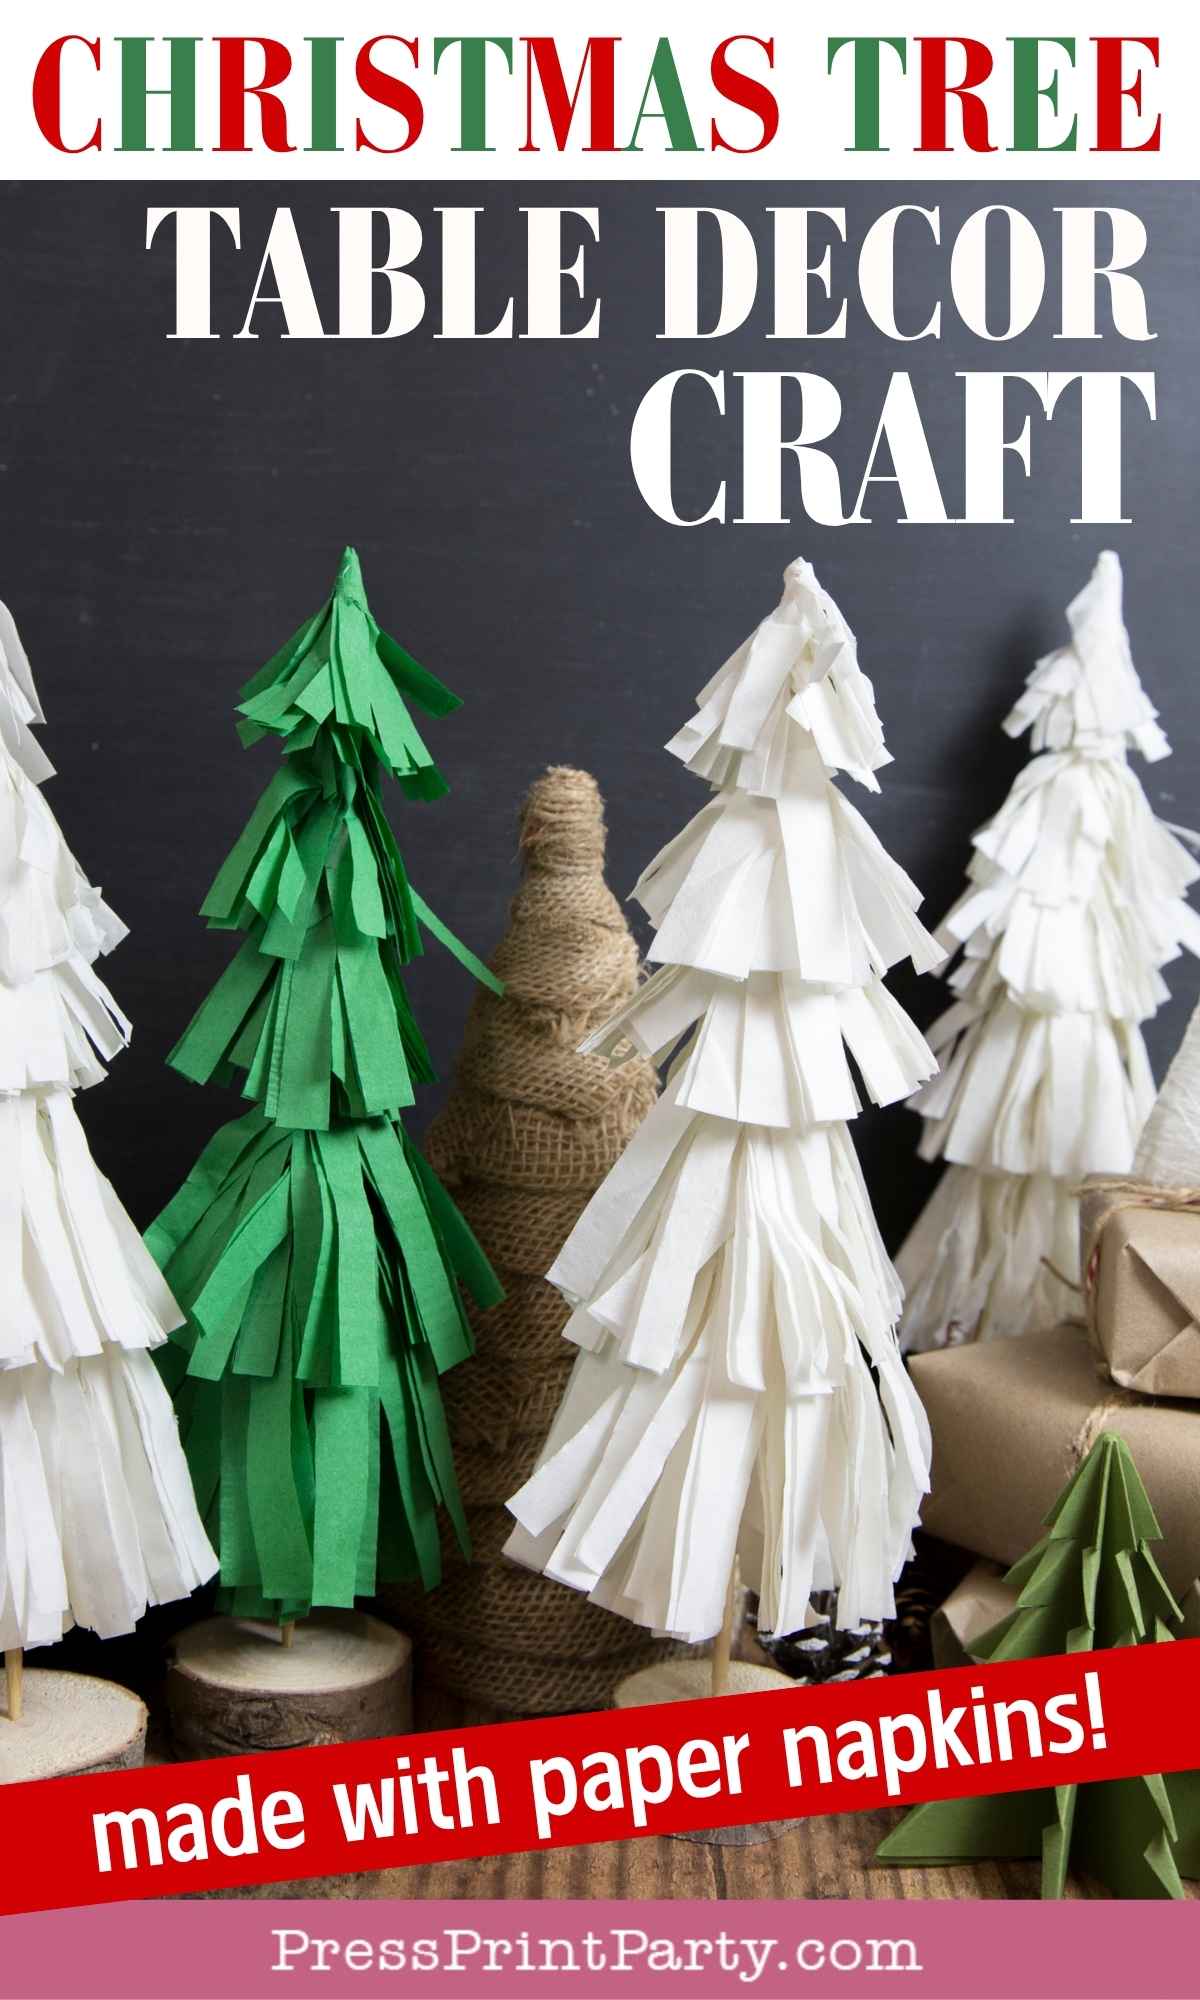
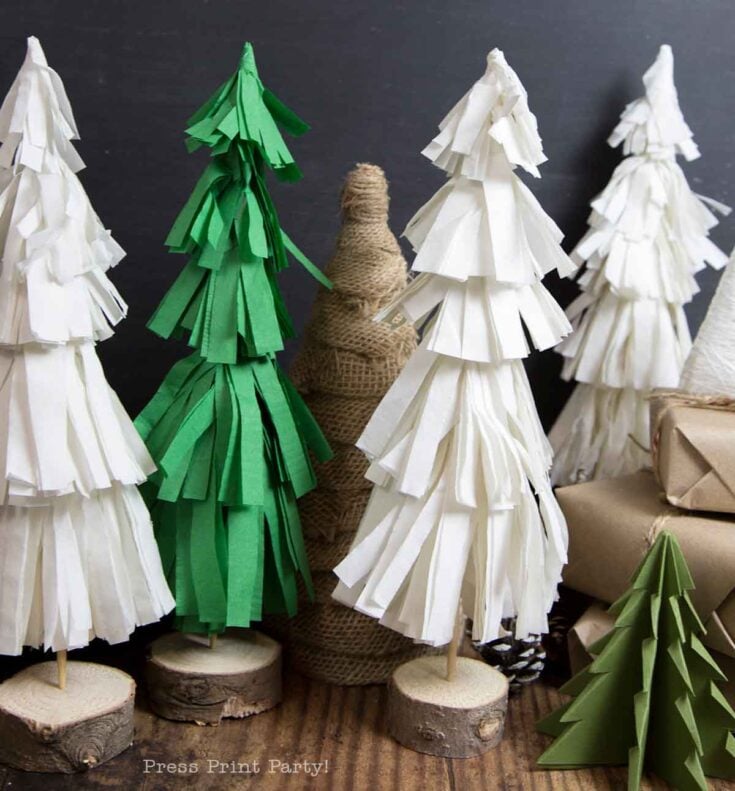
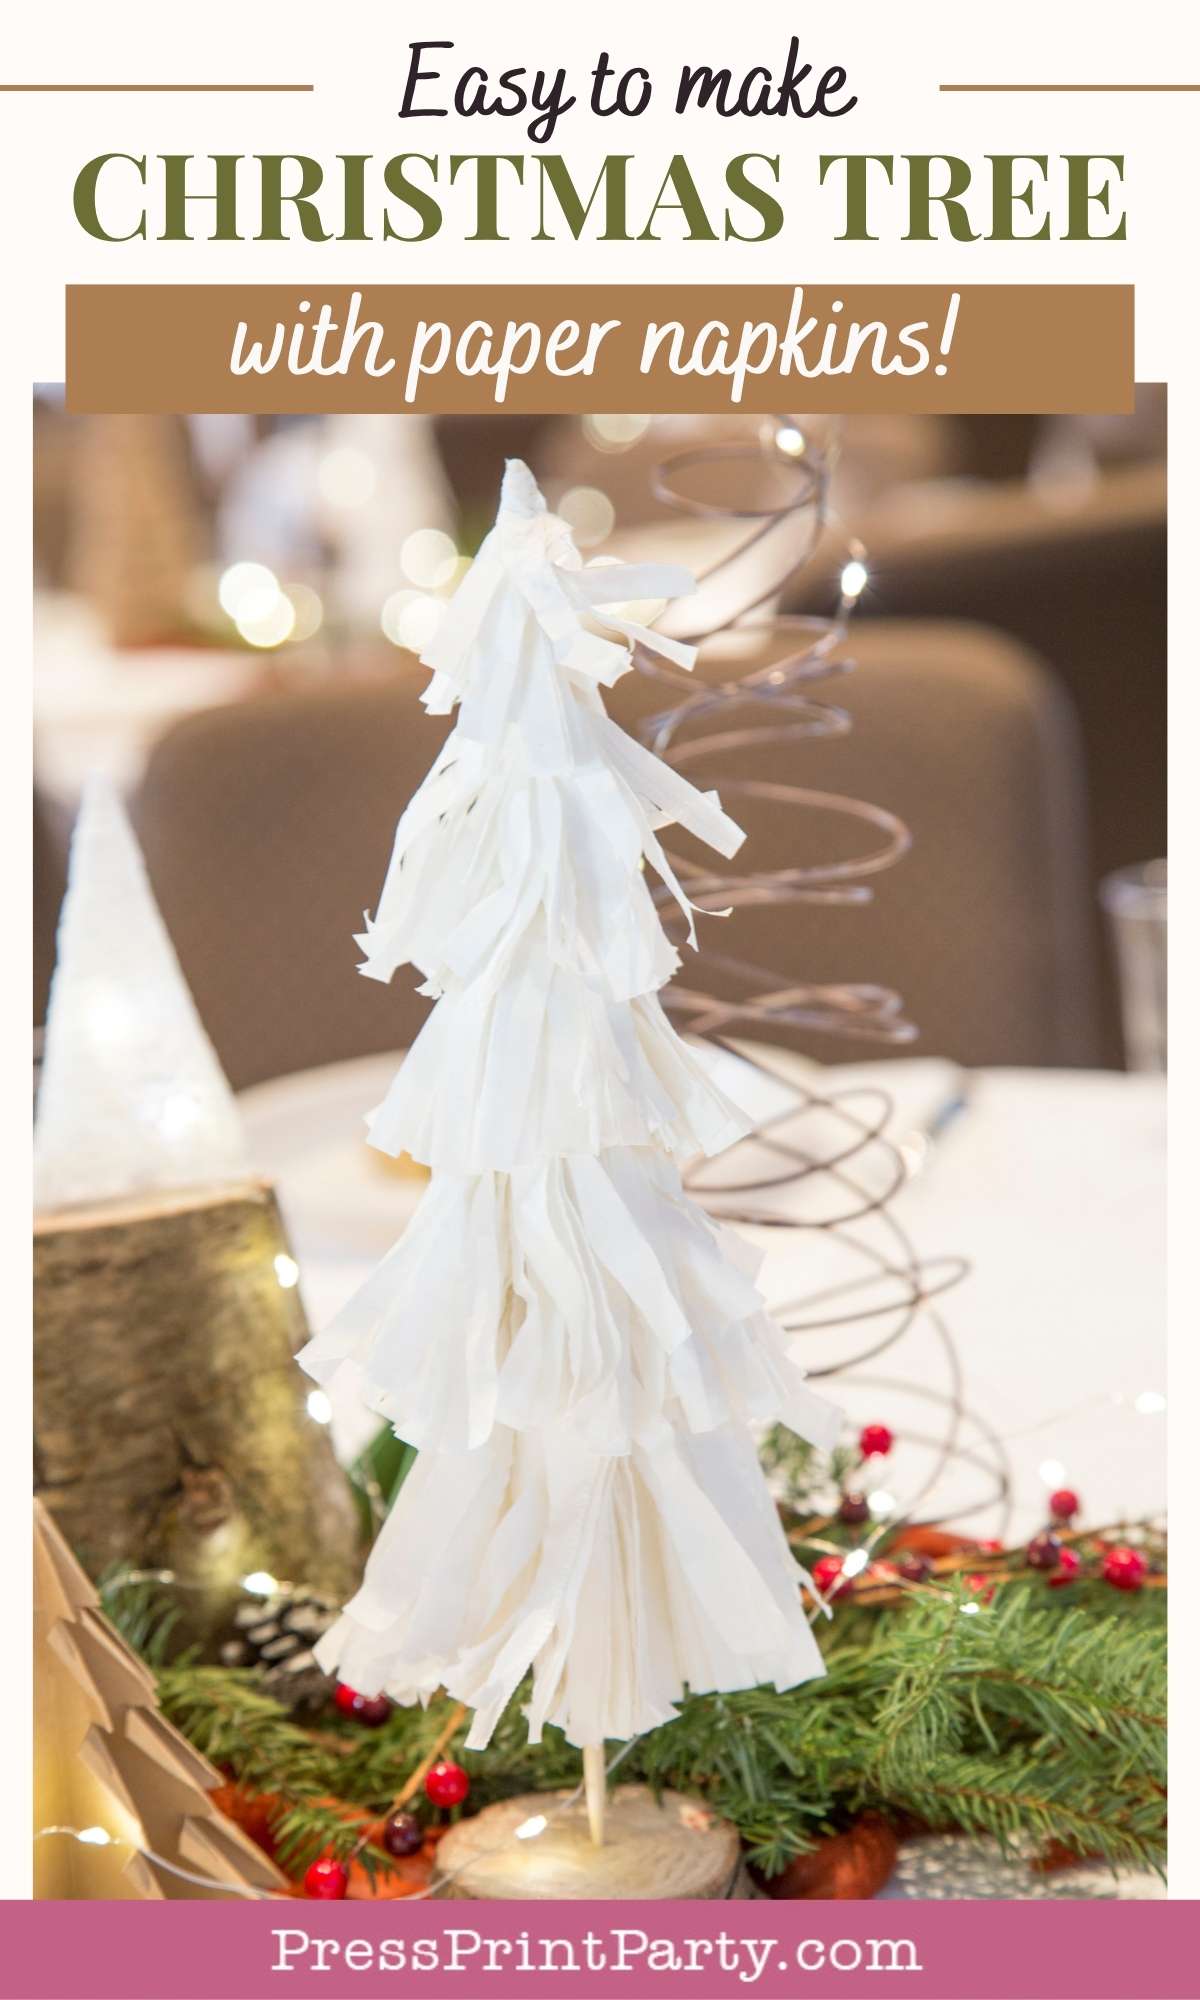
DIY Christmas Tree Table Decor with Paper Napkins
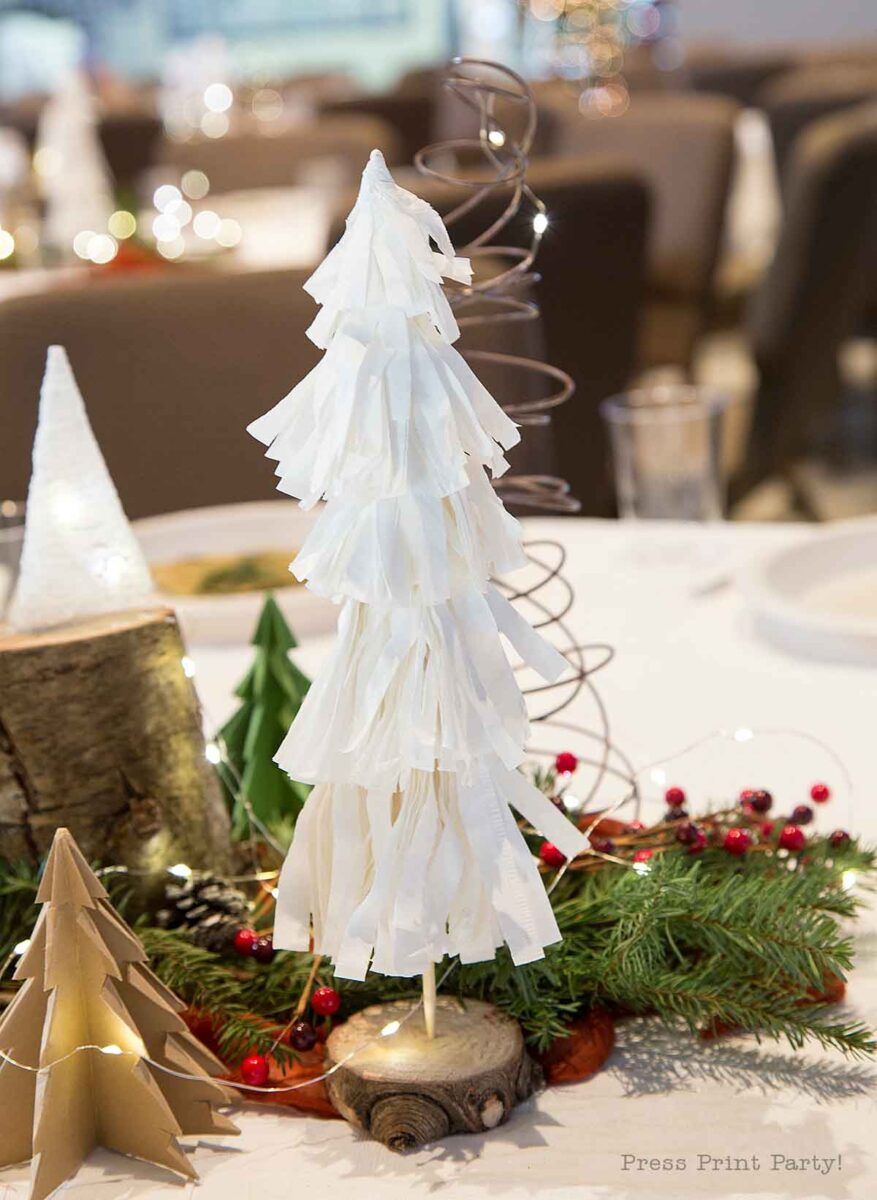
These fluffy Christmas Tree Table Decor pieces came to life because I needed something simple, inexpensive, and still fabulous for my Christmas centerpiece.
Every year, I help decorate the Christmas tables at my church, and this time I wanted a centerpiece that would make a statement. A little forest of festive trees!
With 35 tables to fill and almost no budget, I had to get creative.
This post contains affiliate links. I may earn a small commission at no extra cost to you. Thank you for supporting my blog!
Made from dinner napkins and wooden skewers, they turned out tall, elegant, and delightfully soft-looking. Standing proudly next to my origami paper trees like they belonged together.

The best part?
They’re quick to make, easy on the wallet, and look just as charming on a mantel or shelf at home.
You can mix and match napkin colors to create your own mini forest that fits any theme.
If you’re looking for Christmas party ideas that are budget-friendly and eye-catching, these napkin trees are a total win.
More Christmas Decor Ideas
Deck the halls (and every other surface) with these fun and festive DIYs that make your home sparkle with holiday cheer!
❄️ Rustic Wood Snowflake Ornament – Add a cozy farmhouse touch to your tree with this charming handmade ornament.
🎄 Christmas Crafts for Teens – Cool, creative, and totally teen-approved projects to keep them crafting all season long.
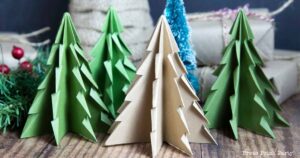
⭐ Folded Paper Christmas Tree – A chic little origami tree that’s perfect for table decor or gifting with flair.
🌲 Frosted Pinecones Tutorial – Bring winter magic indoors with these glistening pinecones straight out of a snow globe.
🍽️ Christmas Table Centerpiece Ideas – Inspiration galore for stunning tablescapes that’ll wow your guests (and your church group!).


Napkin Christmas Tree Decor Materials
You don’t need fancy supplies for this one—just a few simple items you probably already have at home.
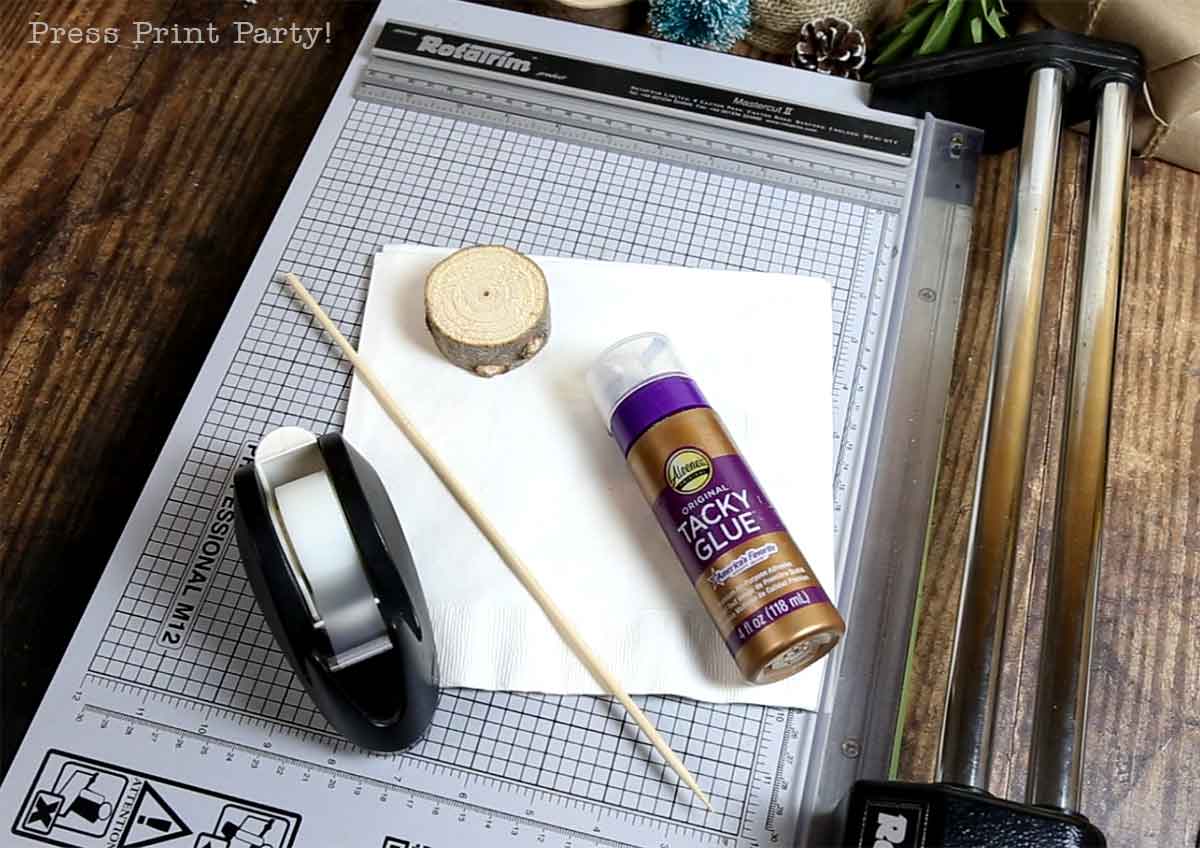
- 4 Dinner Napkins (8″ x 8″) – Any color you want
I used 3-ply 8″x8″ Creative Converting napkins for extra fluff. You can find them at Webstaurant Store, Smart & Final, or occasionally on Amazon. Adjust if your napkins are smaller, larger, or only 2-ply.
You can also use tissue paper cut to size, which I’ve done, but the trees don’t come out as fluffy.
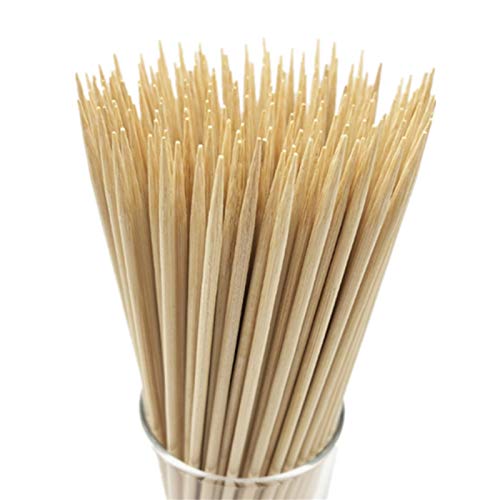
- 1 Wooden Skewer (12″)
- Tape
- Craft Glue
- Small Wood Round with a Small Hole in the Middle
- Paper Cutter (optional, but super handy)
- Scissors
🎥 Watch How These Fluffy Napkin Trees Come Together
If you’re more of a visual learner, you’ll love this part! Watching the video might answer some of your questions.
I go slow (but not too slow) and walk you through the entire process from start to finish. You’ll see exactly how these Christmas tree table decor pieces take shape, fluff and all.
How to Make the Napkin Christmas Tree Table Decor
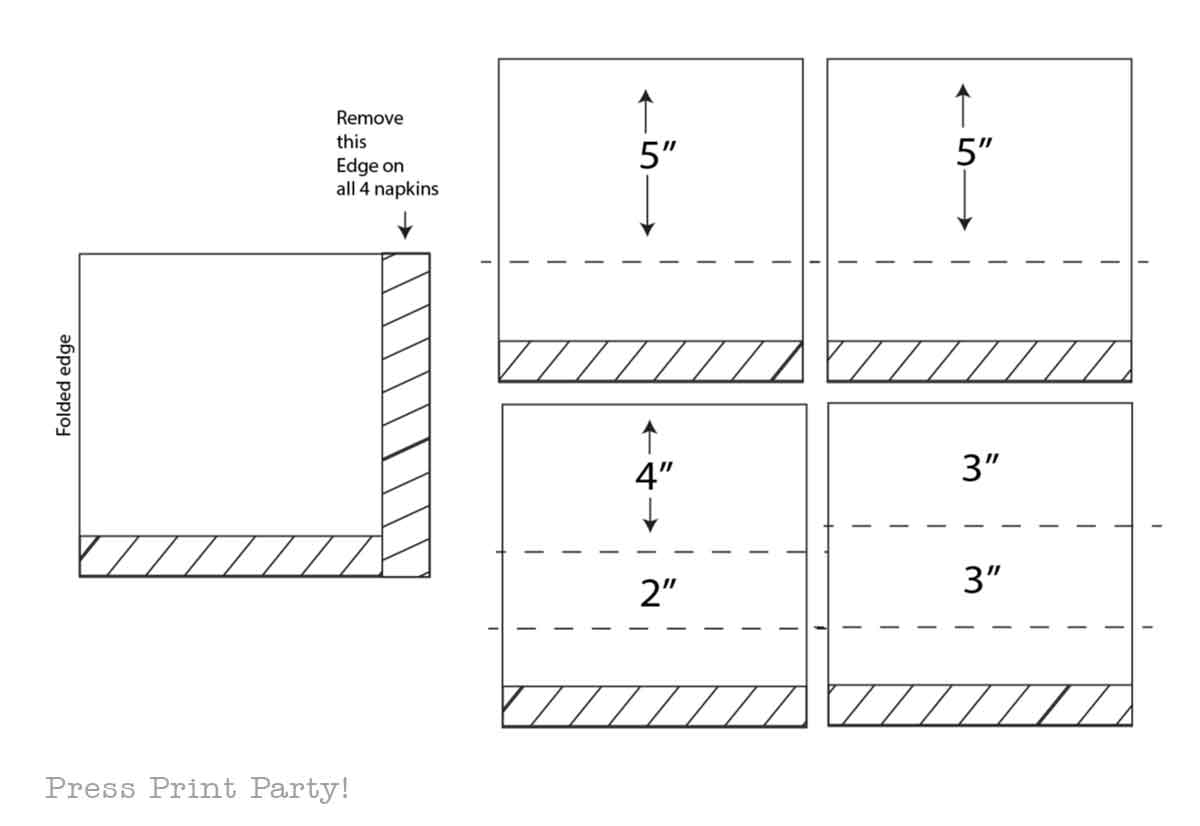
Start by following the cutting guide in the photo — that’ll be your blueprint for how the napkins become layers of your tree.
1- Cut the napkins
First, trim off the textured edge from all four napkins. Then cut:
- Napkin 1: one 5″ section
- Napkin 2: one 5″ section
- Napkin 3: one 4″ and one 2″ section
- Napkin 4: two 3″ sections
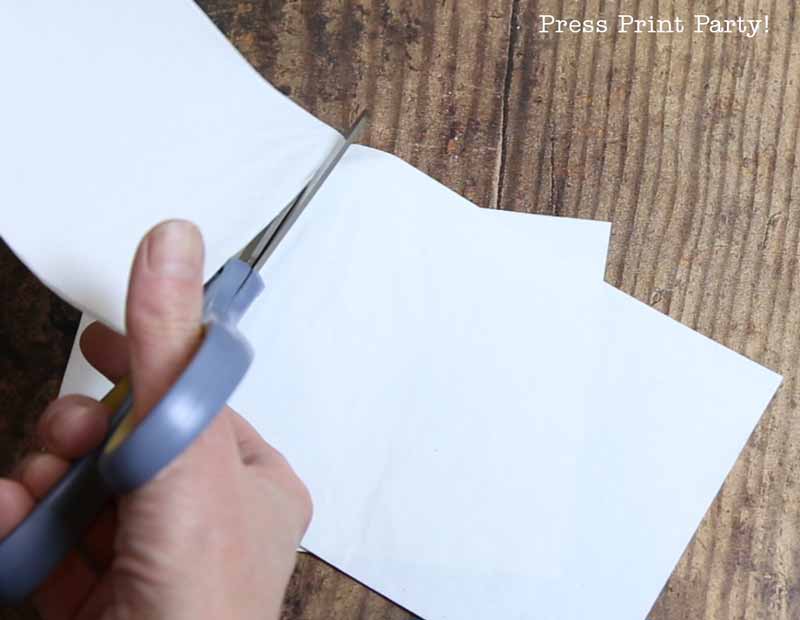
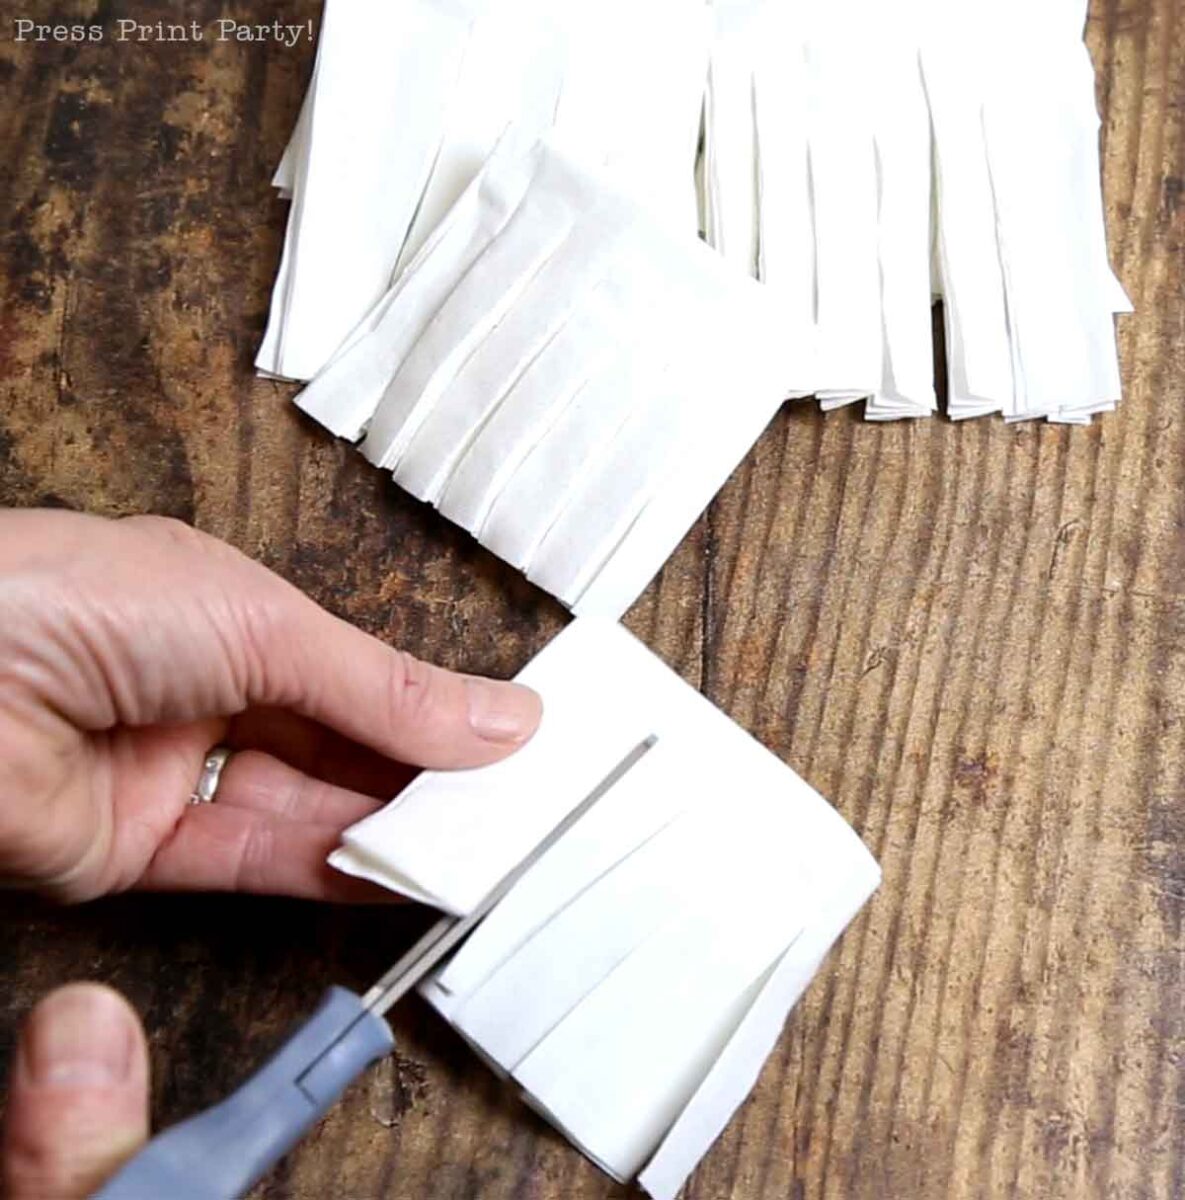
2- Fringe the layers
- Open one of the 5″ sections and cut it in half. Stack the full section and one half together and cut fringes, leaving about ½” uncut at the top.
- Fringe the 4″ section
- Fringe one of the 3″ sections
- Fringe half of the other 3″ section (to reduce bulk at the top of the tree)
- and 1 half of the 2″ section.
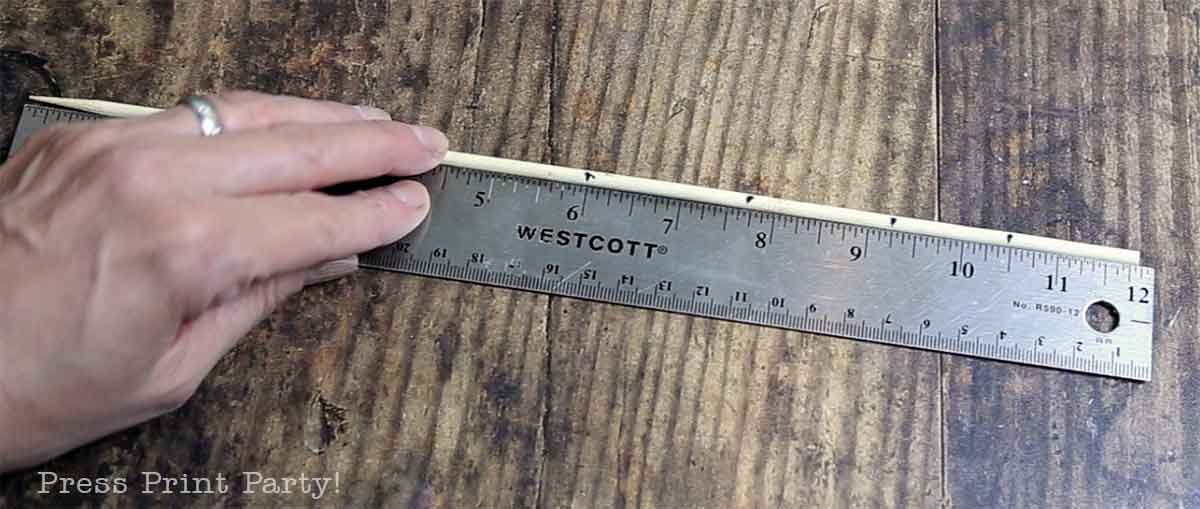
3- Mark your skewer
Follow the measurement guide to mark your skewer — these marks show where each layer will sit as you build your tree.
4- Assemble the tree
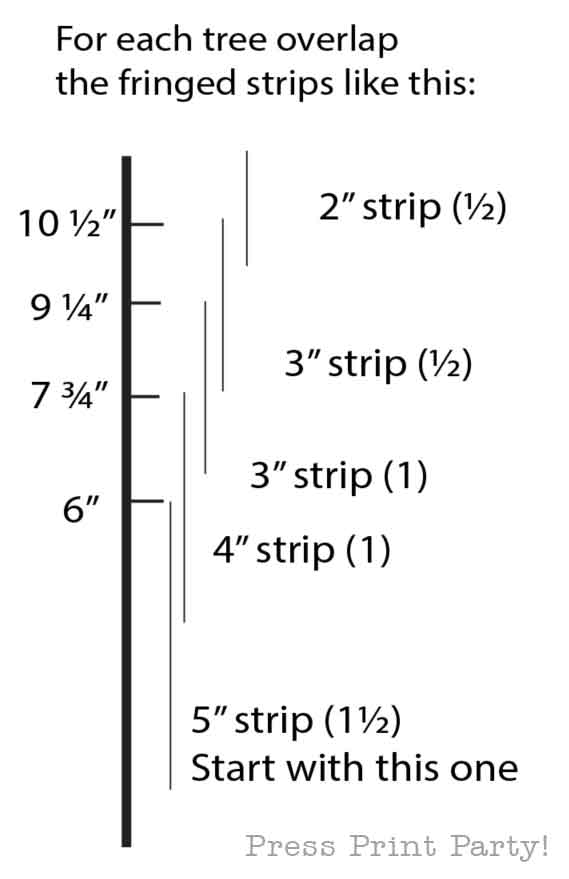
- Tape and roll the 5″ fringes at the 6″ mark. Secure with tape.
- Tape and roll the 4″ fringes at the next mark. Secure with tape.
- Tape and roll the 3″ fringes above that. Secure with tape.
- Tape and roll the half 3″ fringes next. Secure with tape.

Spread glue on the tip of the skewer, then glue and roll the half 2″ fringes to form the top.
5- Finish it up
Shape the top to a gentle point and fluff the napkin layers a bit.
Then, insert the skewer into the hole in your round, wooden base.

That’s it — one beautiful, fluffy tree done! Repeat with different napkin colors to create your own festive forest.


Paper Napkin Christmas Tree Table Decor Tutorial
Materials
- 4 dinner napkins (8"x8")
- 1 wooden skewer (12")
- tape
- craft glue
- small wood round with hole
Tools
- scissors
- paper cutter (optional)
Instructions
- Cut off the textured napkin edge.
- Cut napkins:

- Open one 5" section, cut in half. Stack full 5" + half section, fringe—leave ½" uncut at top.
- Fringe 4", one 3", half of the other 3", and half of the 2" sections.
- Mark skewer using guide.

- Tape and roll layers from bottom up: 5", 4", 3", half 3", then glue top with half 2".
- Shape the tip into a point, fluff layers, and insert a skewer into the wood round base.
Recommended Products
As an Amazon Associate and member of other affiliate programs, I earn from qualifying purchases.

DIY Christmas Tree Table Decor FAQs
Can I use different napkins or tissue paper?
Yes! You’ll get different types of fluffiness depending on the material. Thicker napkins make fuller trees, while tissue paper gives a softer, more delicate look. Try mixing both for variety!
Can I make smaller or larger trees?
Absolutely. Just adjust your napkin sizes or trim your skewer shorter or taller. The method stays the same—just scale the cuts and layers to fit your size.
Do I have to use a wood round base?
Nope! You can use a cork, a small foam block, or even stick your tree into a bit of clay. Anything that keeps it upright will work just fine.
Don’t forget to pin this cute Christmas tree table decor craft tutorial:


&url=https://www.pressprintparty.com/shop/printable-christmas-stickers-food/&media=https://www.pressprintparty.com/wp-content/uploads/2025/09/christmas-vintage-labels-set-2-foods-1.jpg)