
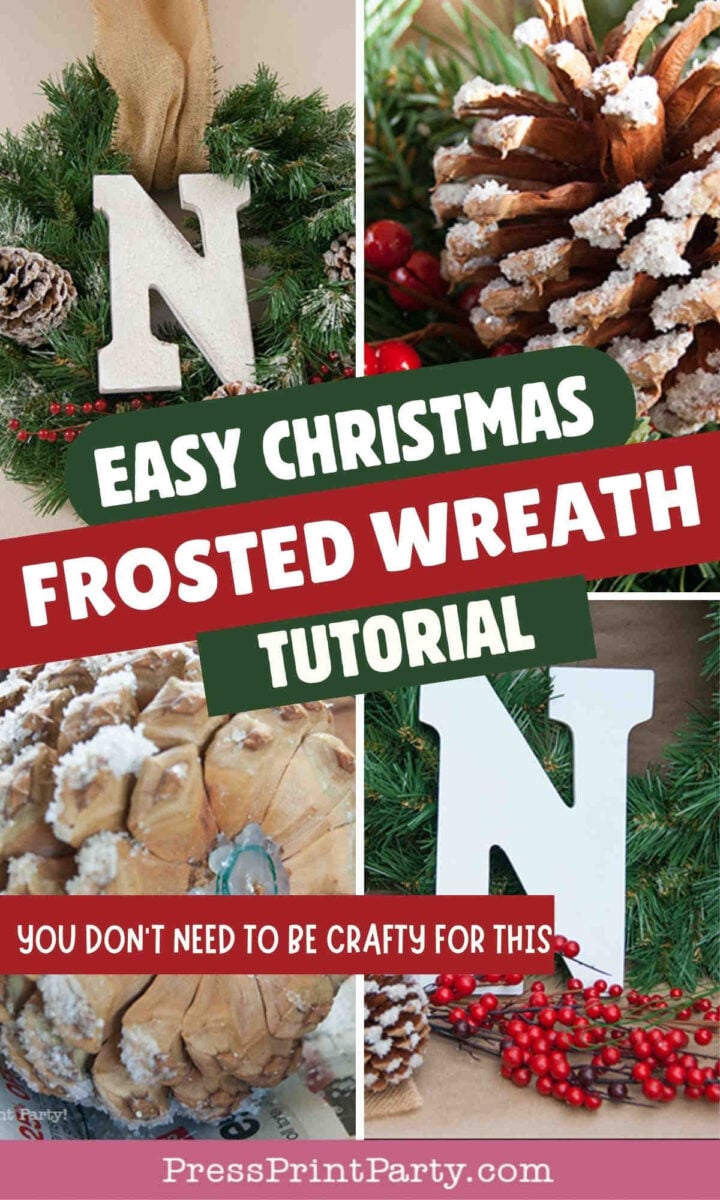
How to Make Frosted Christmas Wreaths with Letters
The boring hallway of our church needed some holiday spirit, so I created these lovely Frosted Christmas wreaths to brighten it up.
They’re simple to make and add a huge focal impact to any space.
Perfect for anyone looking for Christmas party ideas that are festive and easy!
This post contains affiliate links. I may earn a small commission at no extra cost to you. Thank you for supporting my blog!
🎄 More Christmas Craft Inspiration
Get your glue and glitter ready — these festive craft ideas will sleigh your holiday decorating and gift‑making this season!
🎨 Christmas Crafts for Teens – Cool and creative projects teens will actually want to make.
✨ DIY Christmas Ornaments for Kids – Fun, kid‑friendly ornaments to deck your tree.
🌟 Christmas Party Centerpiece – A show‑stopping DIY centerpiece for your holiday table.
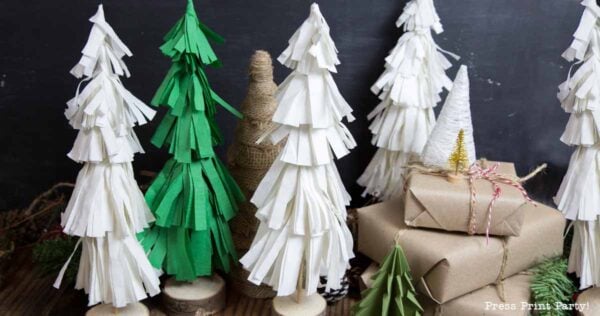
🎄 Folded Paper Christmas Tree Origami – Elegant and easy origami trees for decor or gifting.
🎃 Mini Pumpkin Place Card Holders – Quirky place card holders to spice up your holiday spread.


Why You’ll Love This Frosted Noel Wreath DIY
This is one of those rare Christmas crafts that checks all the boxes:
- It looks high-end (like something you’d buy at a boutique)
- It’s surprisingly easy to make
- You can customize it to match your decor
- And it doesn’t take all afternoon (because who has time for that in December?)
If you’ve ever pinned a “simple Christmas DIY” and then immediately regretted your life choices halfway through… this is not that project.
This one actually turns out.

You’ll also love:
Frosted Christmas Wreaths Tutorial
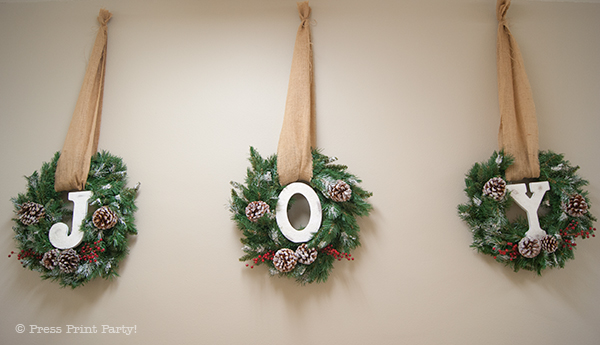
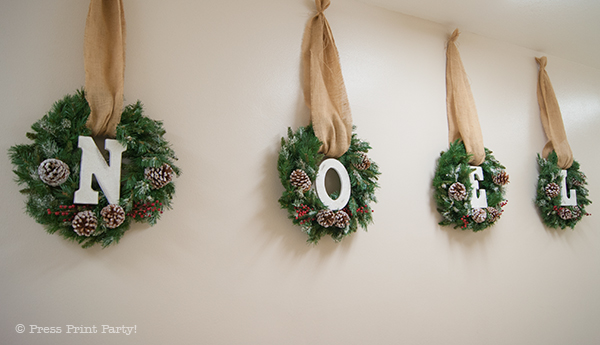
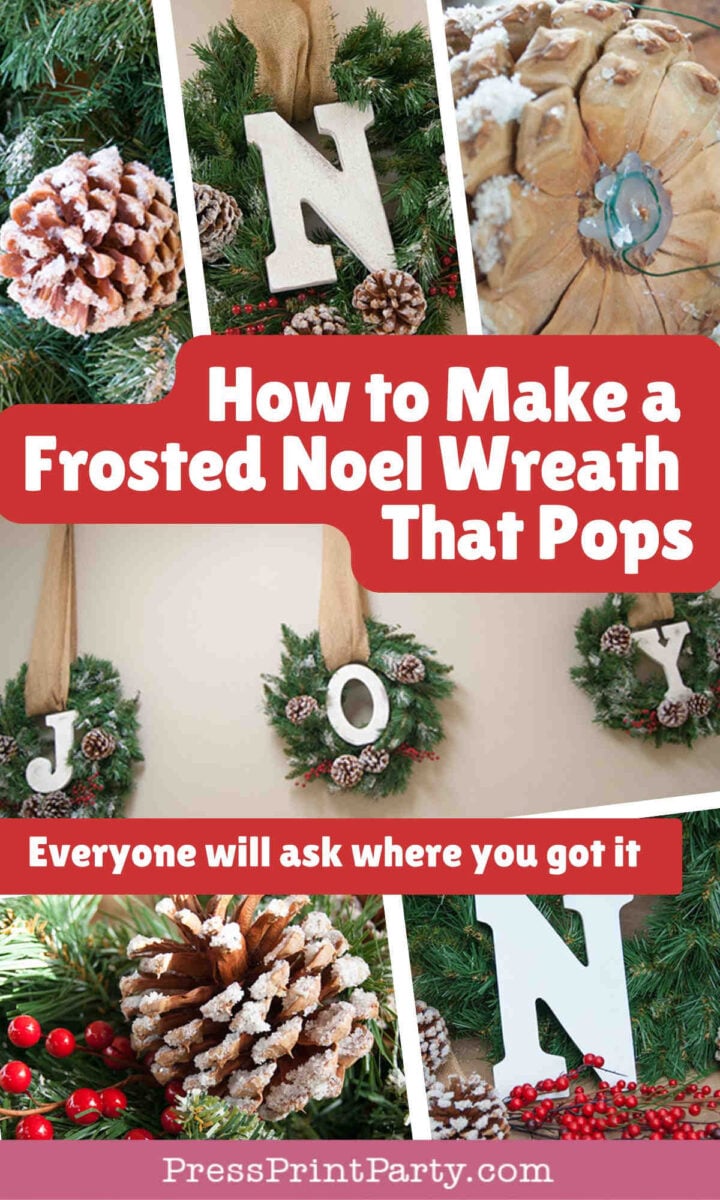
One side of the hallway says NOEL. And the other says JOY.
You will need:
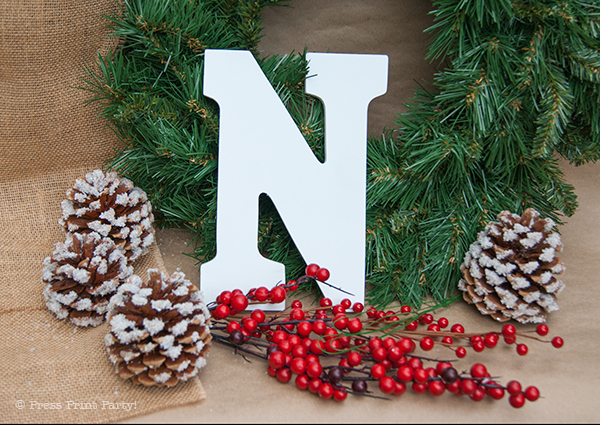
- Letters (here N,O,E, L – but it would work with JOY or any other combination). I found these at Michael’s.
- Green Wreaths – One for each letter.
- Pinecones – Four for each wreath.
- Epsom salt and glitter for the frosting process.
- Fake red berries.
- A strip of burlap.
- Glue gun.
- White glue.
- Green wire.
- Sanding paper.

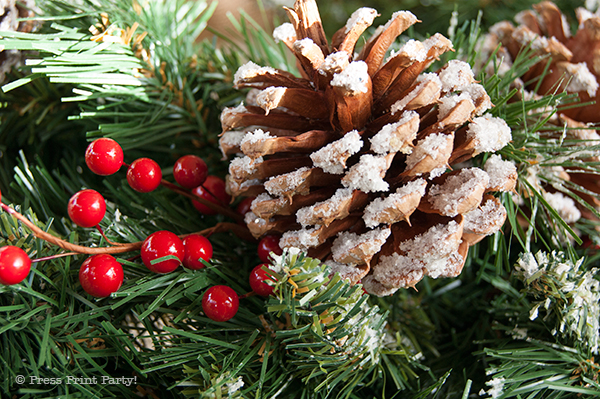
Refer to this tutorial to frost the pinecones.
Then spread white glue to some of the wreath branches and add the Epsom salt/glitter mixture to frost.

Hot glue the green wire to the ends of the pinecones
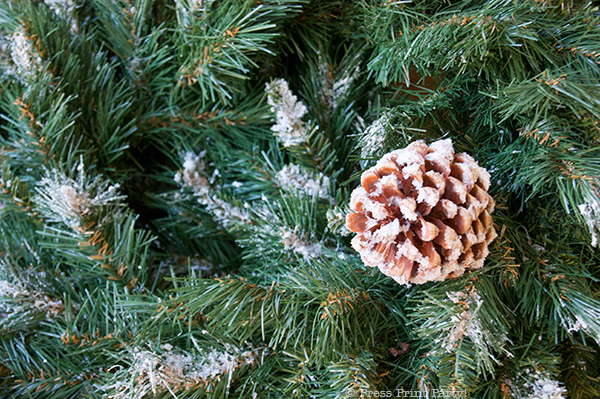
and attach them to the wreath.
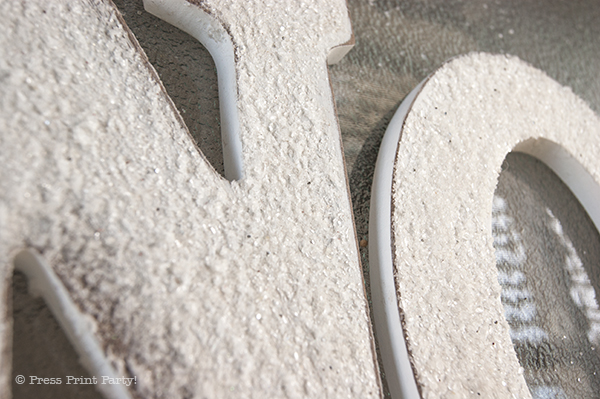
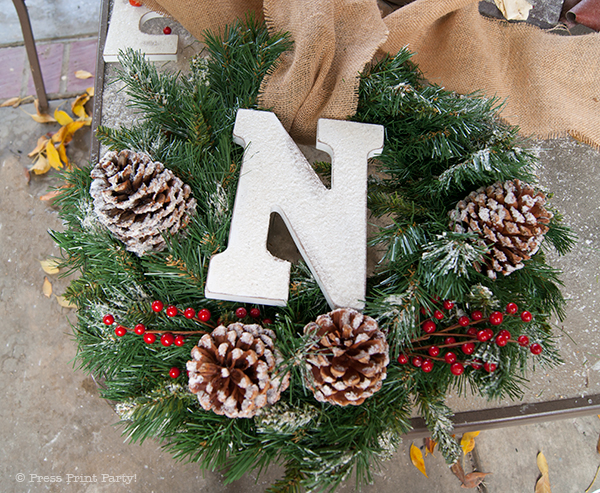
Sand the edges and some of the middle of the letters to antique them a bit.
Spread white glue over the top and sprinkle the frosting mixture.
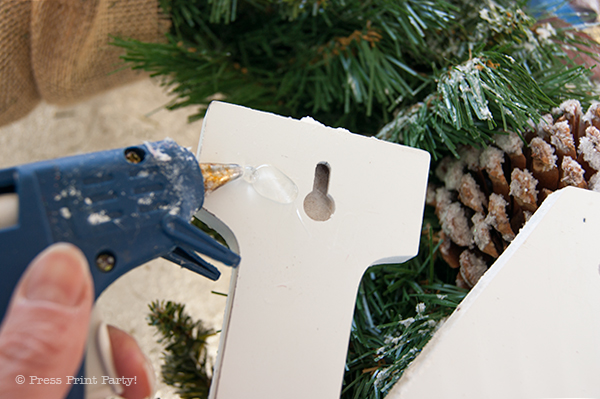
Hot glue the letters to the wreath by bending some branches to hold the letter in place.
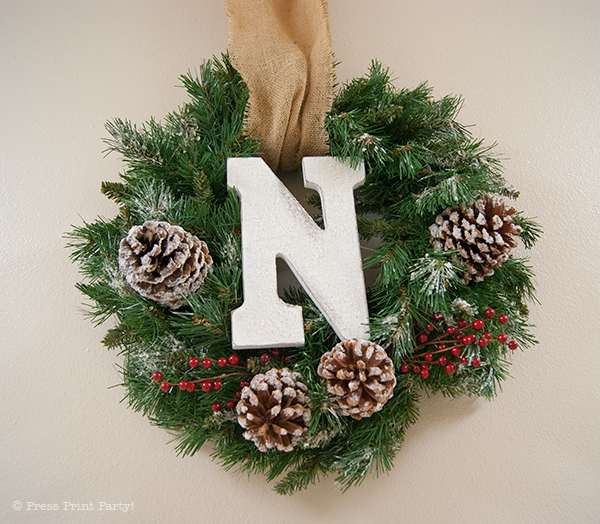
Hot glue some red berries to the bottom and add the burlap strip to the top.
Et voila!
Where to Hang Your Noel Wreath Letters
This is where people start imagining it in their home (which = clicks + saves):
- Above your mantle
- In a long hallway
- On a blank wall that needs something festive
- Across a window or entryway
- On a front door (secured well)
- As a backdrop for holiday photos
It’s one of those pieces that instantly makes your space feel like Christmas without pulling out 27 bins of decor.
FAQ: Frosted Noel Wreath Letters DIY
Can I use real greenery instead of faux?
You can, but faux lasts longer and won’t dry out or make a mess.
What kind of letters work best?
Wood or thick cardboard letters work best because they’re sturdy and easy to glue onto.
Can I make a different word?
Yes! Try JOY, PEACE, or even your family name.
How do I store these after Christmas?
I store mine in a big bin.
Is this a good beginner DIY?
Yes—this is a great project even if you’re not super crafty.


Don’t forget to pin these Frosted Christmas Wreaths:


&url=https://www.pressprintparty.com/shop/printable-christmas-stickers-food/&media=https://www.pressprintparty.com/wp-content/uploads/2025/09/christmas-vintage-labels-set-2-foods-1.jpg)