
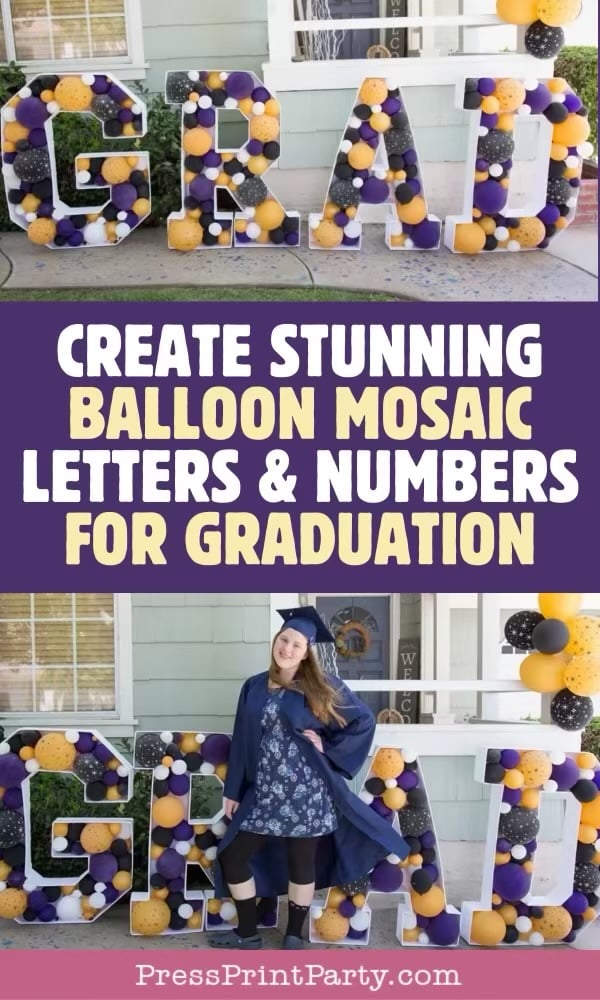
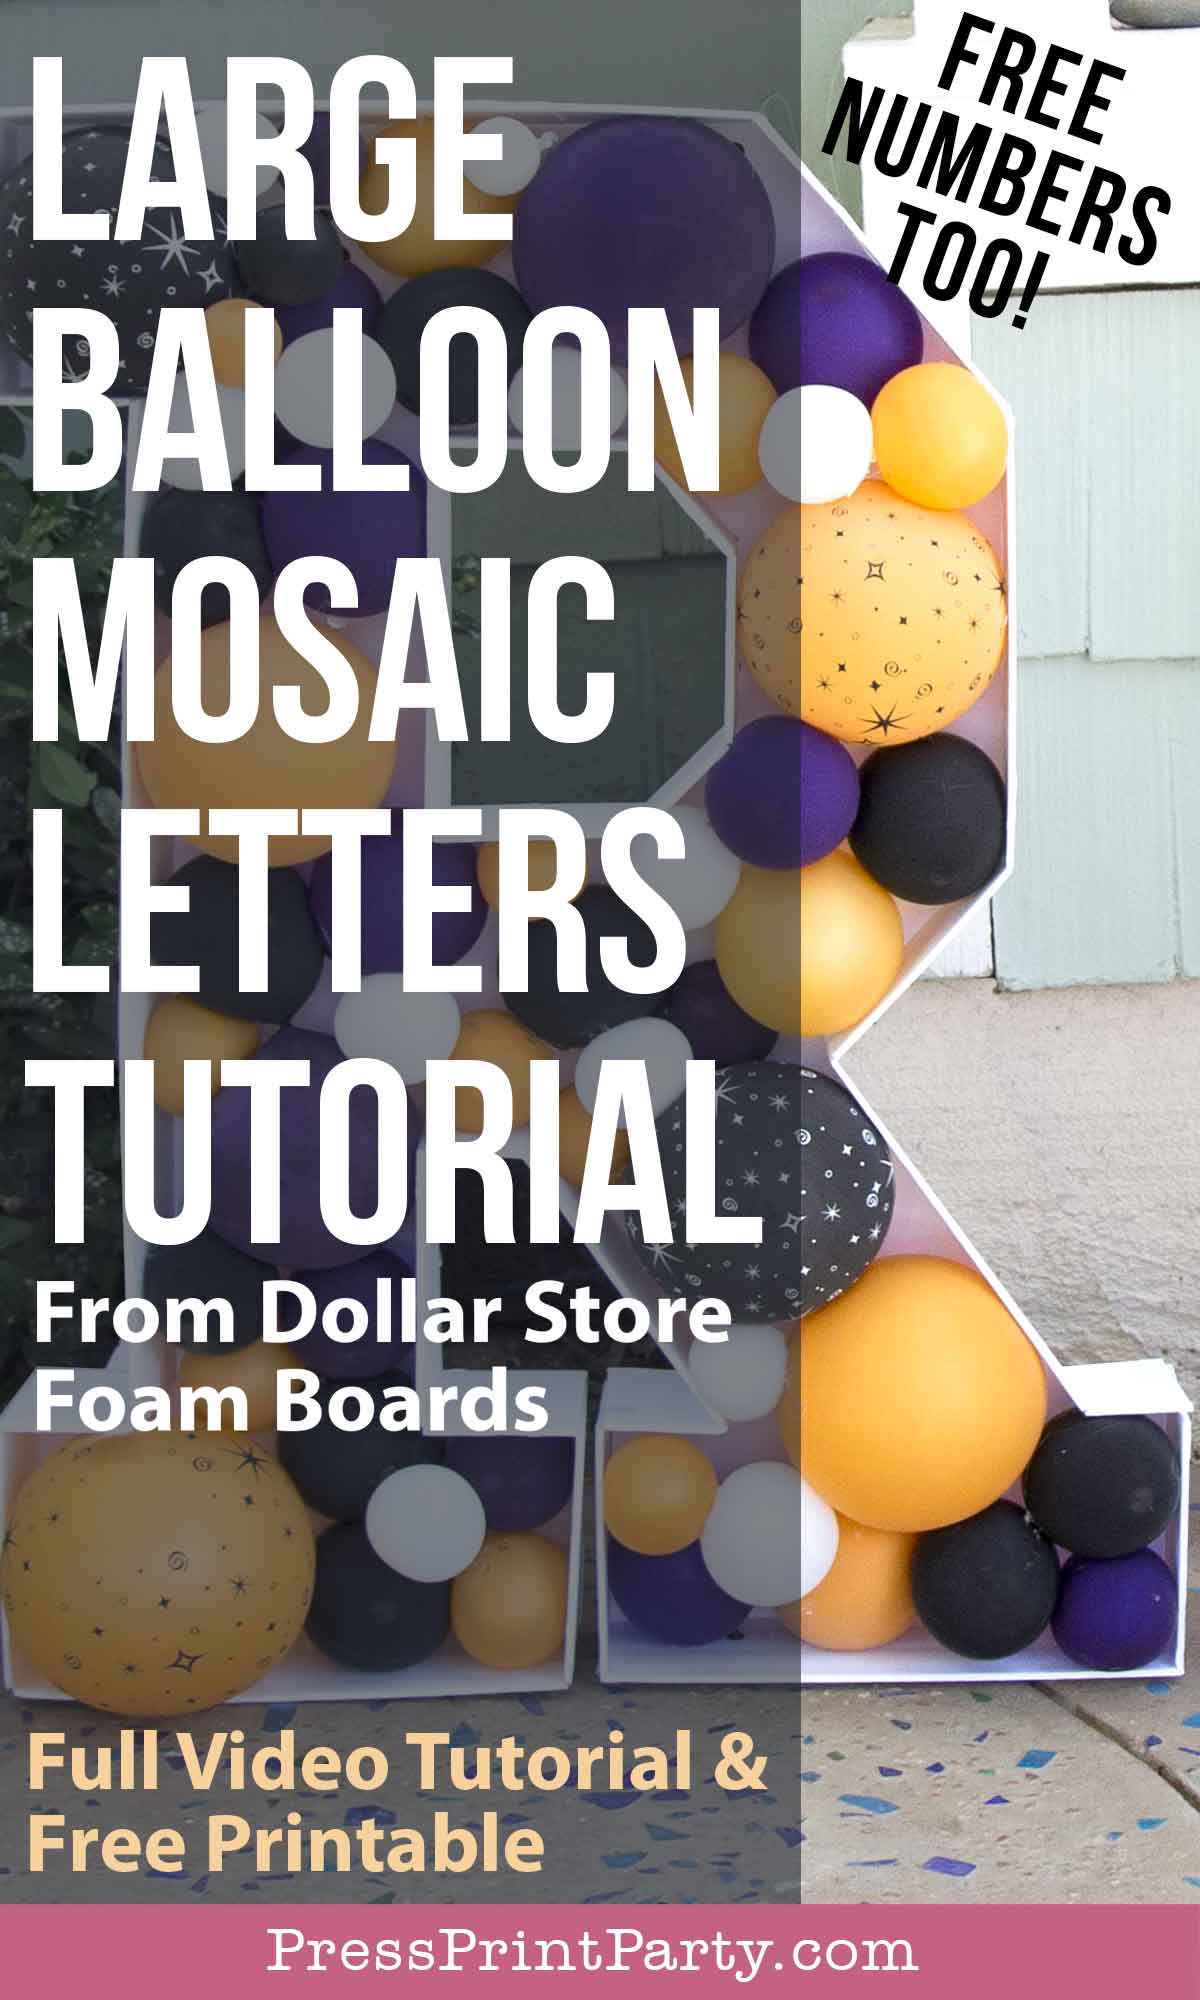
Create Stunning Balloon Mosaic Letters & Numbers for Graduation (Free Template)
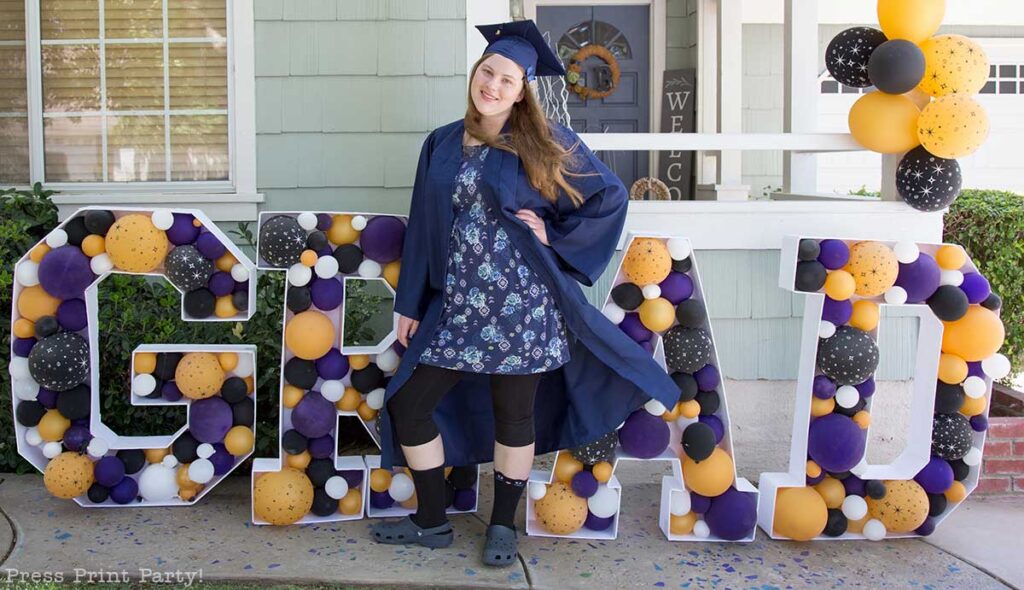
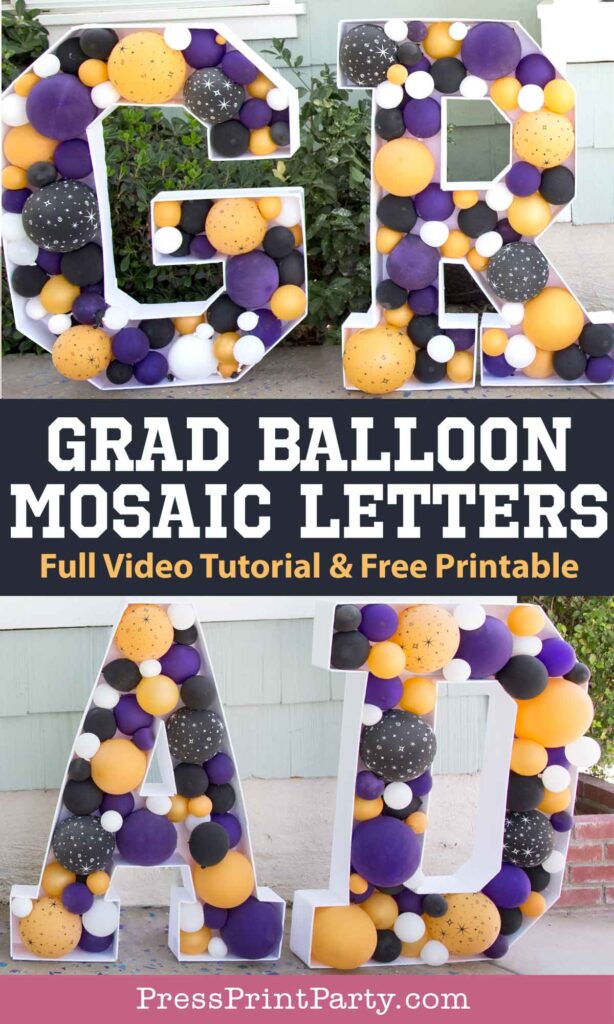
These giant balloon mosaic letters and graduation party ideas made a great statement in front of our house for my daughter’s graduation party.
Standing more than 3′ tall, nobody could miss the enormous GRAD Balloon Mosaic Letters sign in front.
This post contains affiliate links. I may earn a small commission at no extra cost to you. Thank you for supporting my blog!
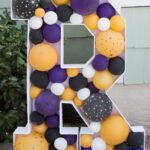
Although I really also wanted to make balloon mosaic numbers, I just ran out of time.
But the free template includes the GRAD balloon mosaic letters as well as all the balloon mosaic numbers in a collegiate-type font.
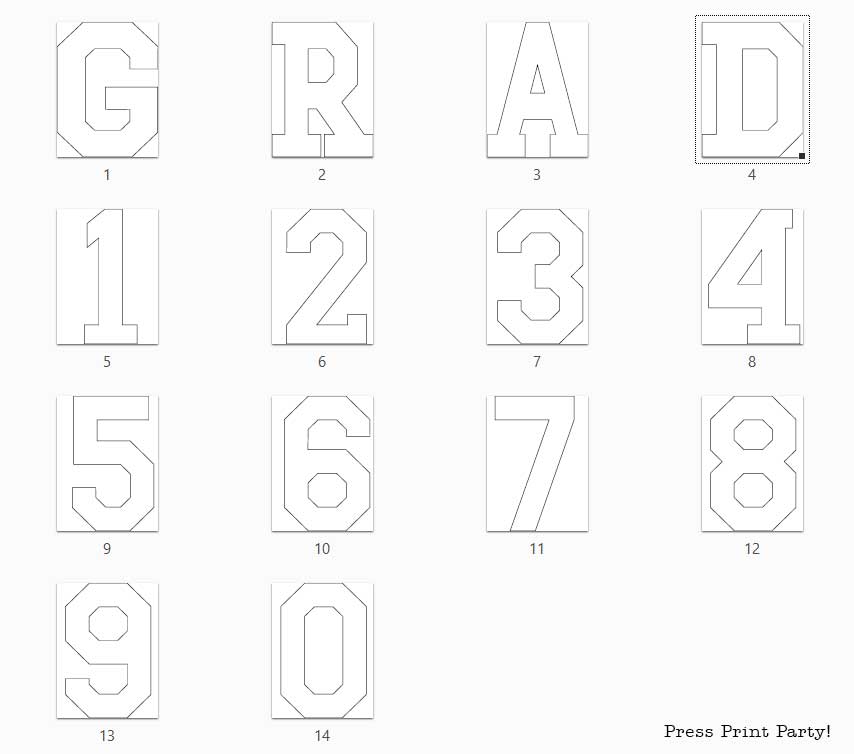
The advantage of this font is that all the lines are straight. No making curves! Which makes this tutorial even easier!
You can use these balloon mosaic number templates for more than graduation parties. They’re very popular for birthday parties as well.
You could, of course, just buy the giant letter or number, but you will still have to assemble it. I think saving $20 per letter is worth the time it takes to cut the letter and the walls.
These letters only cost me the price of the foam boards which I found at the Dollar Store. So for less than the price of one store-bought letter, I made 4!
| Contents |
|---|
🎓 More Graduation & Balloon Decor Magic
If graduation parties had a personality, it would be “go big or go home”—and these DIY ideas definitely go big. From balloon mosaics to money leis, it’s all about celebrating in style without overcomplicating the setup.
🎈 Balloon Mosaic Letters & Numbers – Eye-catching DIY letter displays that turn any space into a graduation showstopper.
🎉 Organic Balloon Garland Basics – Learn how to build those trendy, flowing balloon garlands that instantly upgrade any party backdrop.
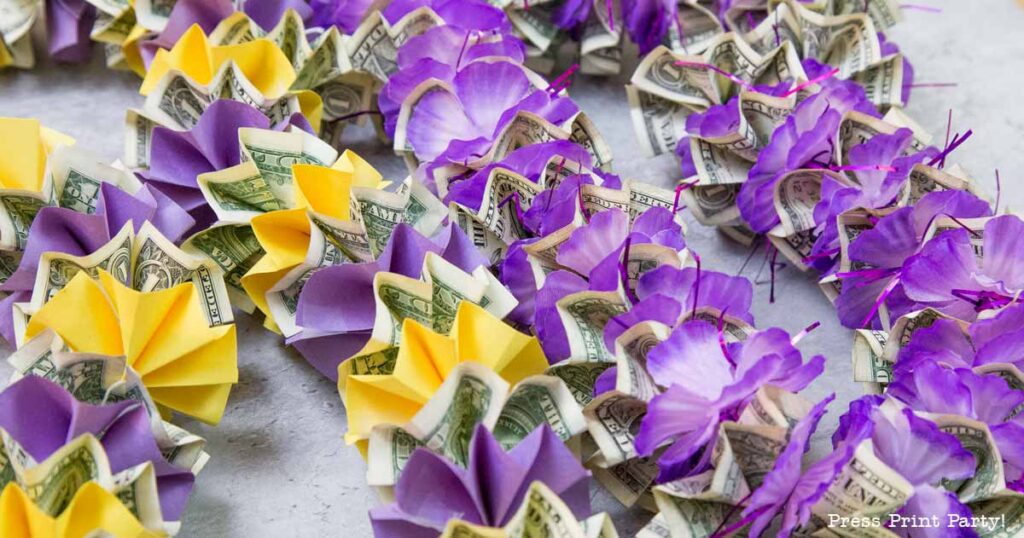
🌸 Graduation Leis Ideas – Fun, festive lei inspiration to honor grads in a colorful, meaningful way.
💸 DIY Money Lei Tutorial – A creative (and very appreciated) way to gift cash for graduation celebrations.
🎊 Open House Graduation Party Ideas – Simple, stylish ideas to host a relaxed yet memorable graduation open house.
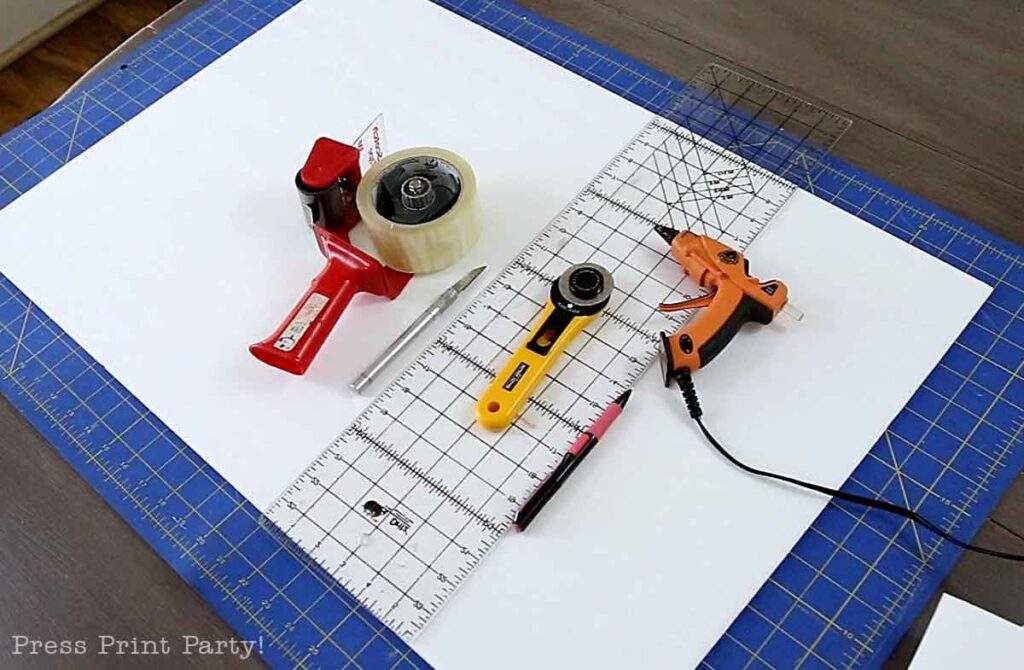
Materials to Make Your Giant Foam Board Letters or Numbers
- An average of 5 20”x30” foam boards per letter. (Dollar Store foam boards work great)
- Ruler
- Packaging tape
- Scotch tape
- Rotary cutter (optional but nice)
- Exacto knife
- Hot glue gun
- Pencil
- Balloons in your chosen colors in various sizes (Some 10″ to 12″ balloons and lots of 5″ balloons)
- A large printout of your letter 40” tall (Get the free template from my library)
You’ll also love:
Balloon Mosaic Letters and Numbers Video Tutorial
I really encourage you to watch the video before you start your project. It’s short and I think it will answer a lot of your questions.
I must apologize for some of the focus on the video, I didn’t realize it was soft until it was too late.
Either way, the steps are also below in pictures and schematics.
And please sign up to my YouTube channel by clicking here:
How to Make Balloon Mosaic Letters
Most of those shots were taken from the video on which the focus was a little soft. I think you get the idea though.
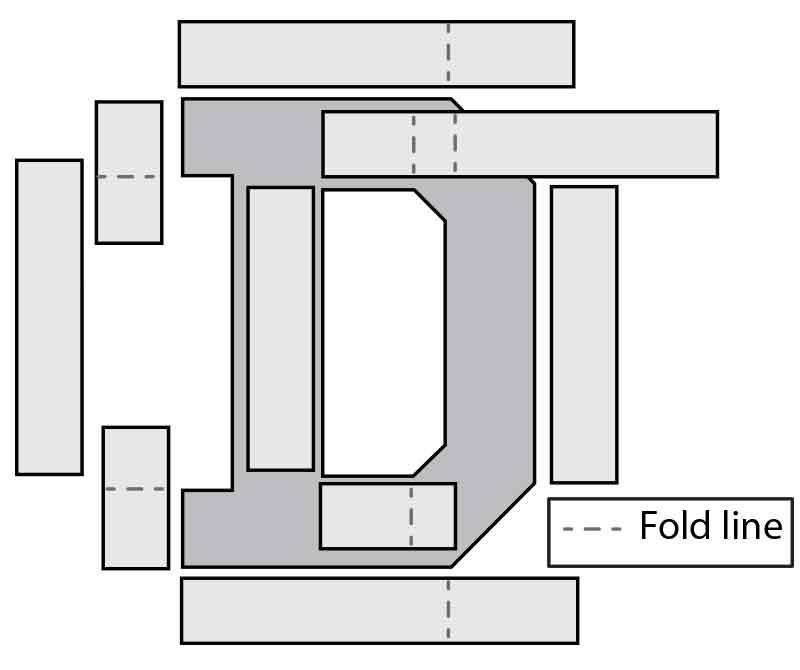
You can also print out a DIY sheet below with diagrams instead. All the instructions are also included as part of the free template download.
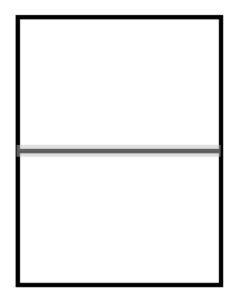
• Cut 5” long strips out of 2 of the foam boards making 8 strips. You may need a little more depending on the letter.
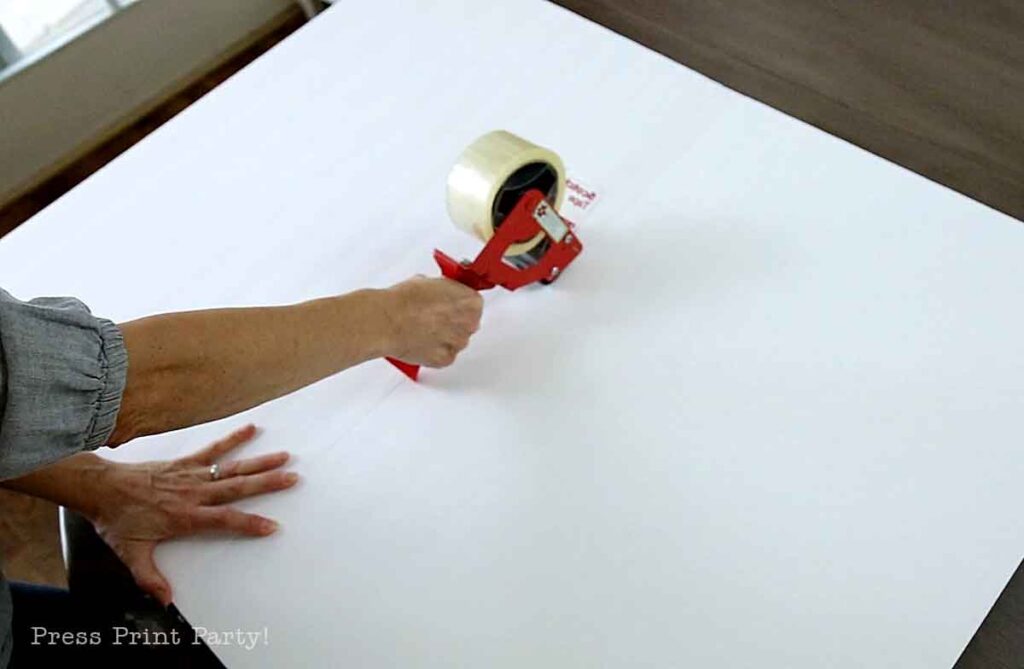
• With the packaging tape, tape 2 of the boards together on the long side making a large 40”x30” board.
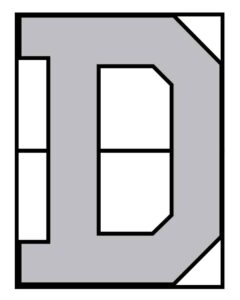
• Print the desired large letter. Use the free PDF digital file from my library.
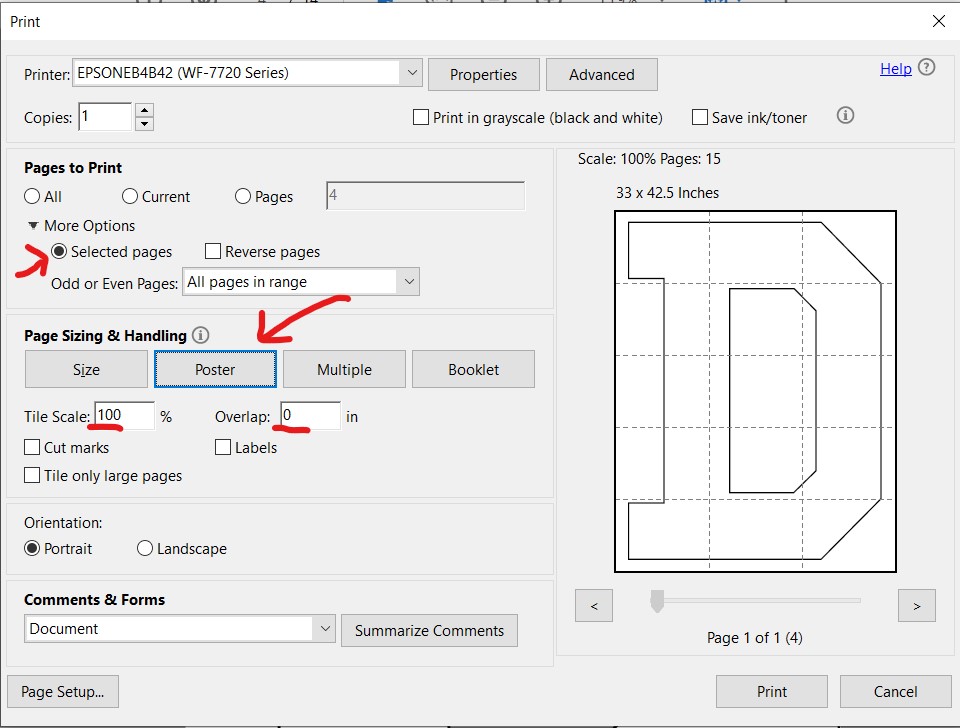
The letter can be printed on several pieces of paper using the “Poster” option when opened in the FREE Adobe Acrobat Reader and setting the overlap to “0”.
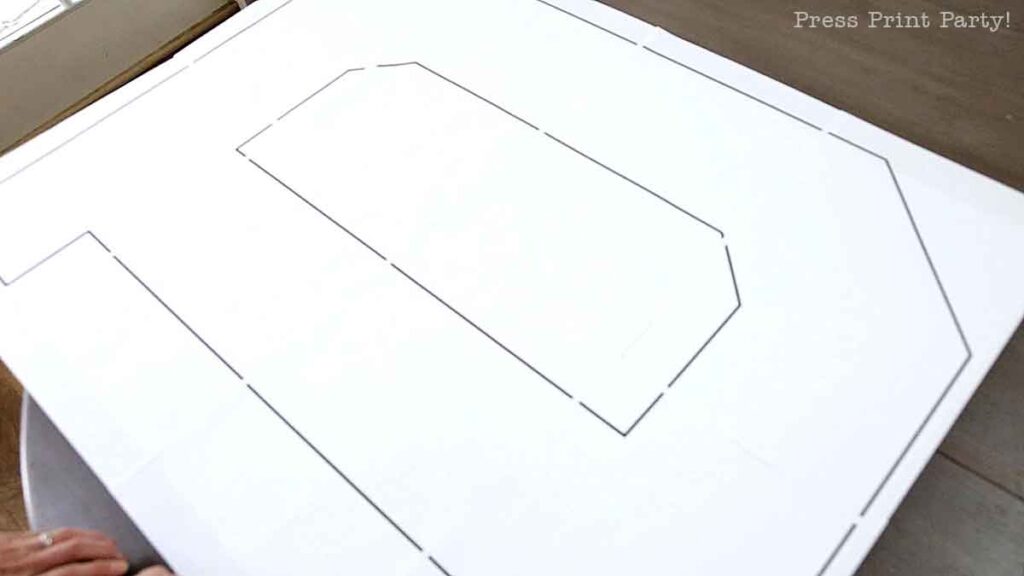
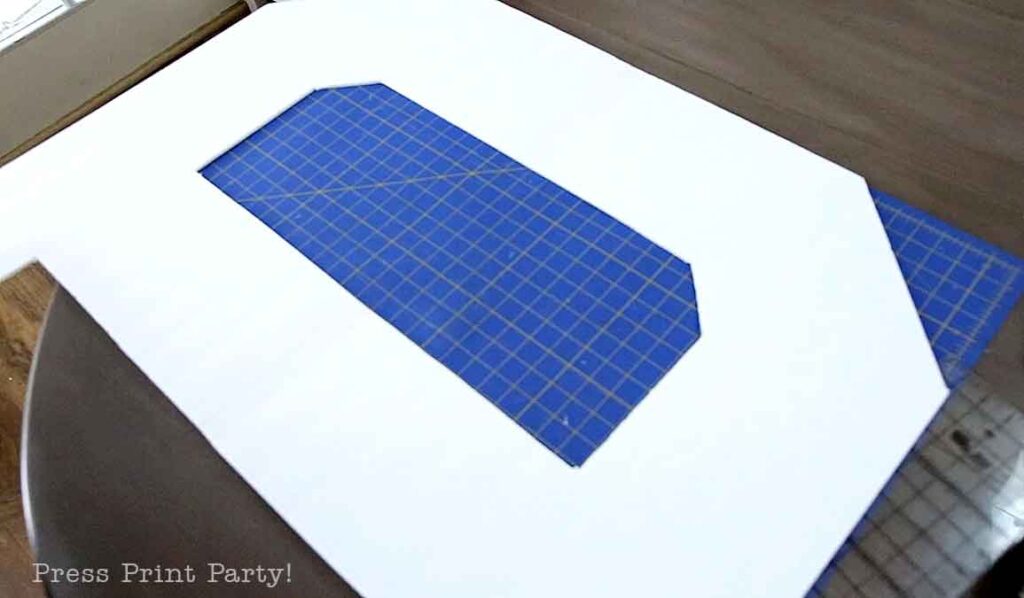
• Arrange the printout of the letter over the large 40“x30” foam board.
Tape the printouts together forming the letter. The top and bottom edges of the print should be on the edges of the foam board.
The letters in this file are 40“ tall when printed at 100%.
Since you set the overlap to 0, the edges of the printed letters will butt to each other. So all you have to do is overlap the margins of the paper.
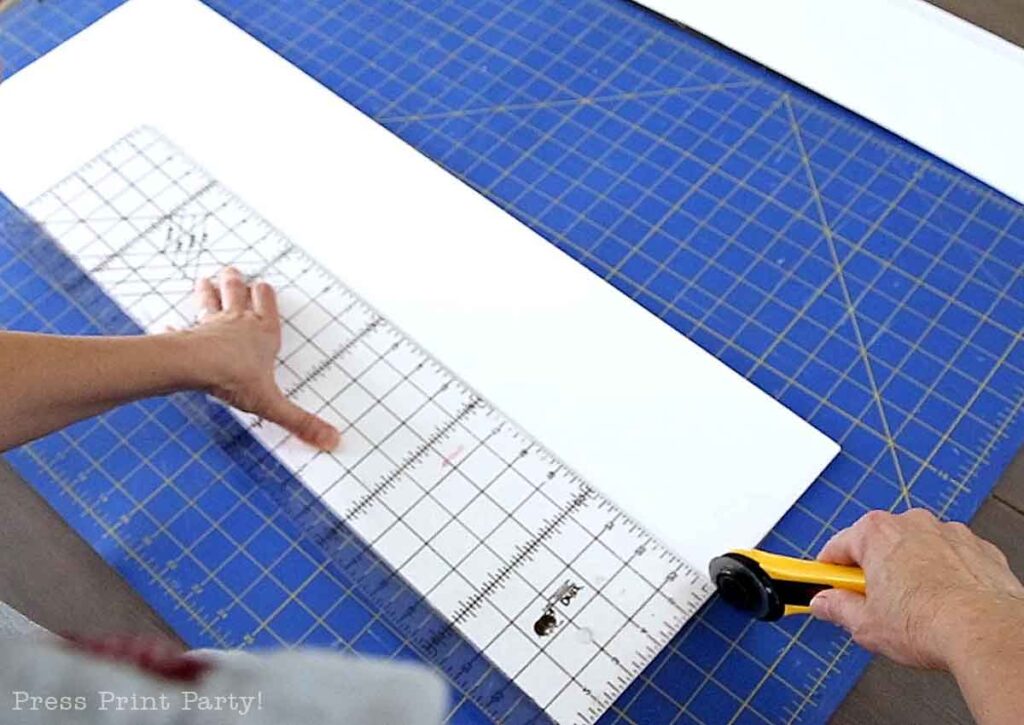
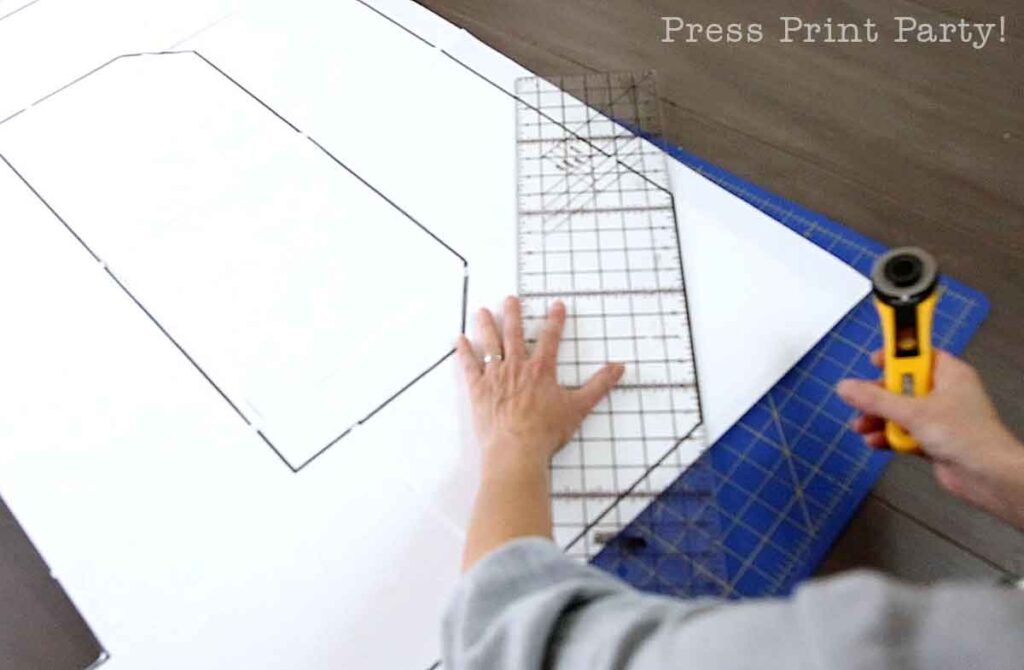
• With the letter pattern on top, trim the foam board on the lines with a ruler and rotary cutter or exacto knife. All the letters and numbers in this set have straight edges.
• Remove the paper.
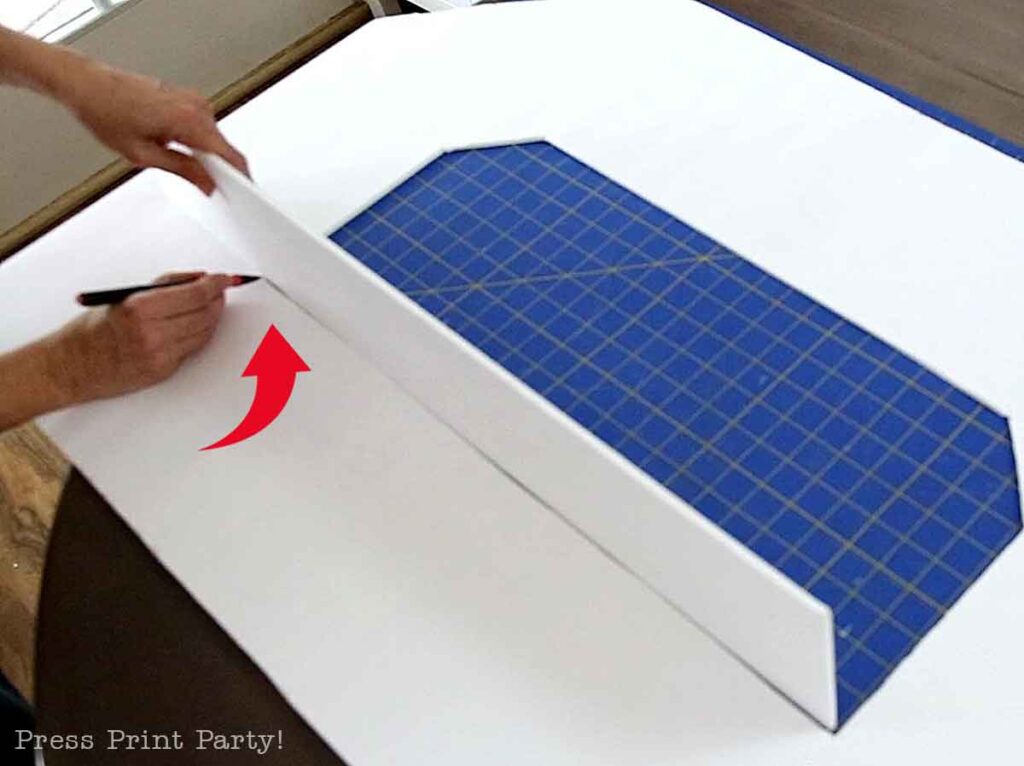
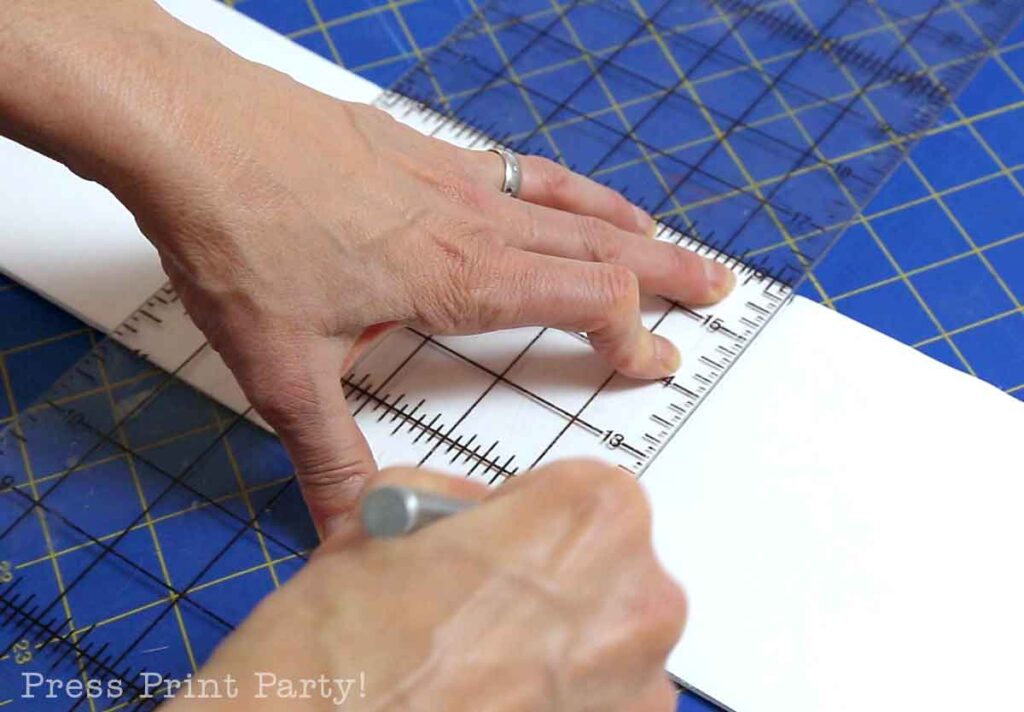
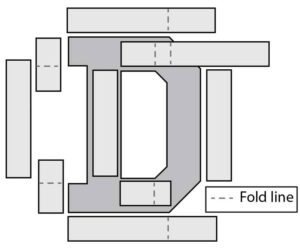
• Mark and cut all the 5” strips to go around the inside and outside of the letter and create the walls.
Whenever possible, score the strip to fold it around the pattern, instead of cutting it.
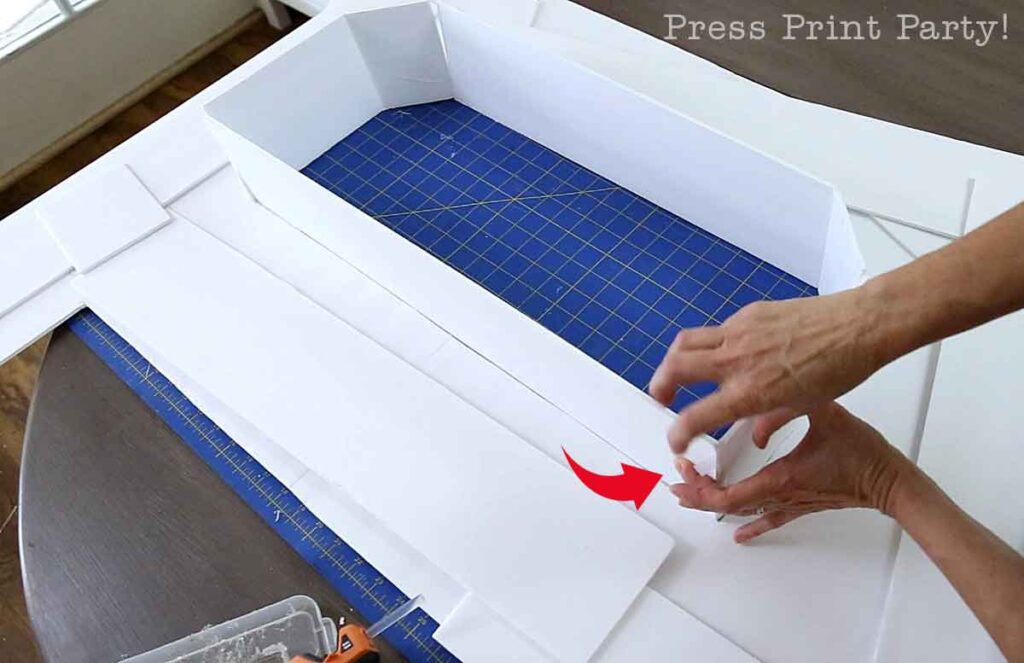
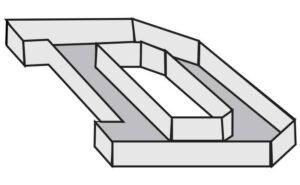
• Glue the strips to the letter body with a hot glue gun by placing the glue on the edges of the 5” strips and gluing to the sides of the letter forming the walls.
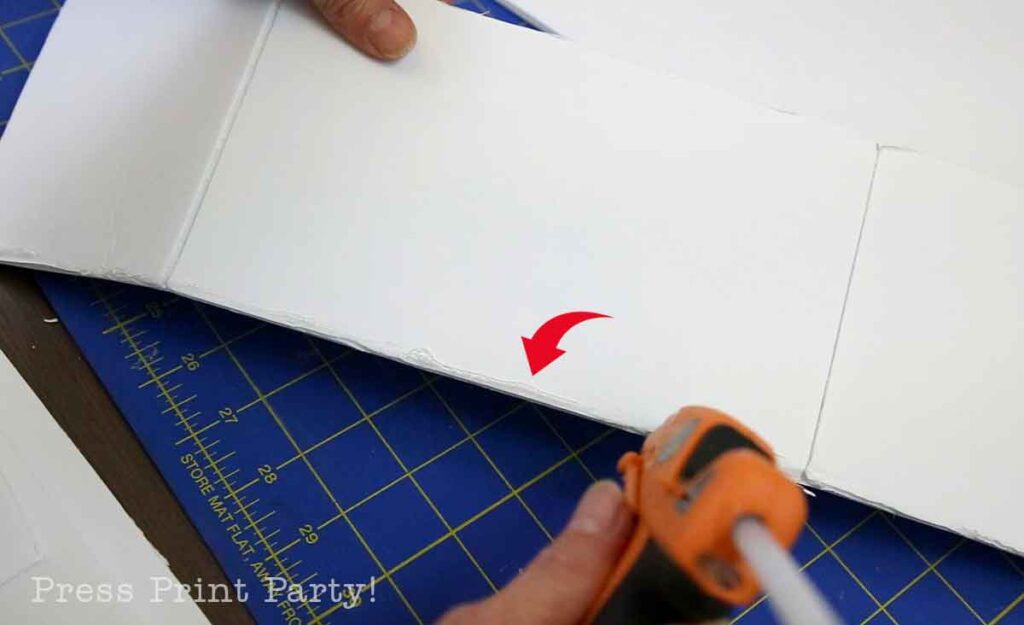
• Glue the corner edges of the strips with hot glue and reinforce them with scotch tape.
Try to keep the tape on the balloon side of the channel.
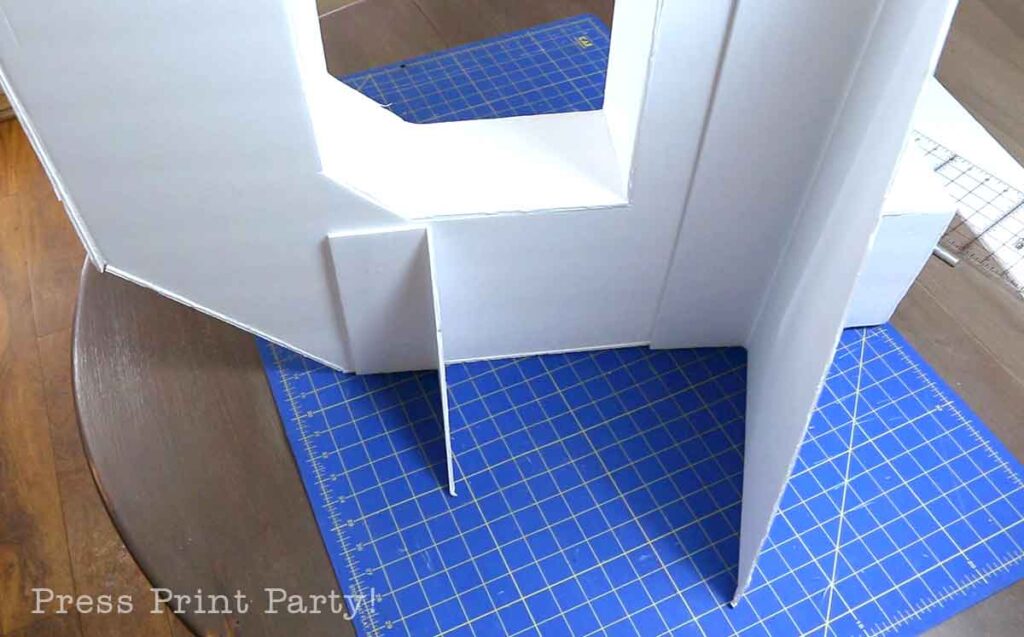
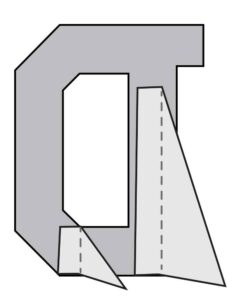
• With an extra foam board or remnants, make a couple of triangle braces to glue on the back of the letter for stability.
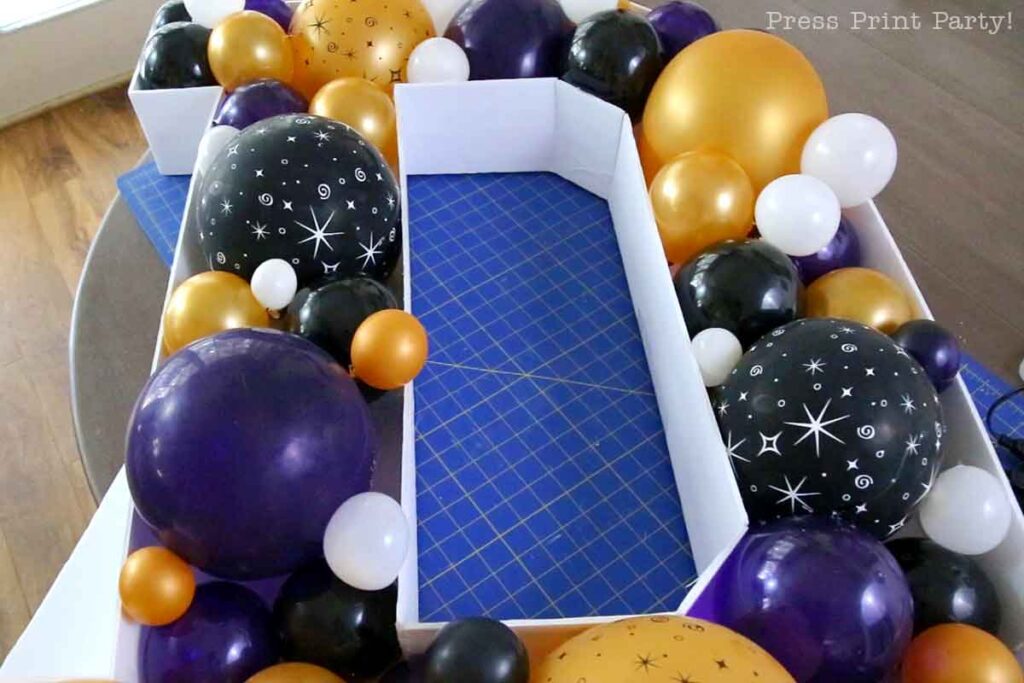
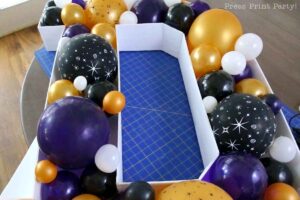
• Fill your letter with balloons. Inflate your balloons only as wide as the channel, but no more.
They should still feel soft to the touch. Otherwise, you risk deforming your channel.
A hot glue gun set on low temperature or glue dots work perfectly.
I made large and medium size balloons with 12″ balloons and smaller balloons with 5″ balloons.
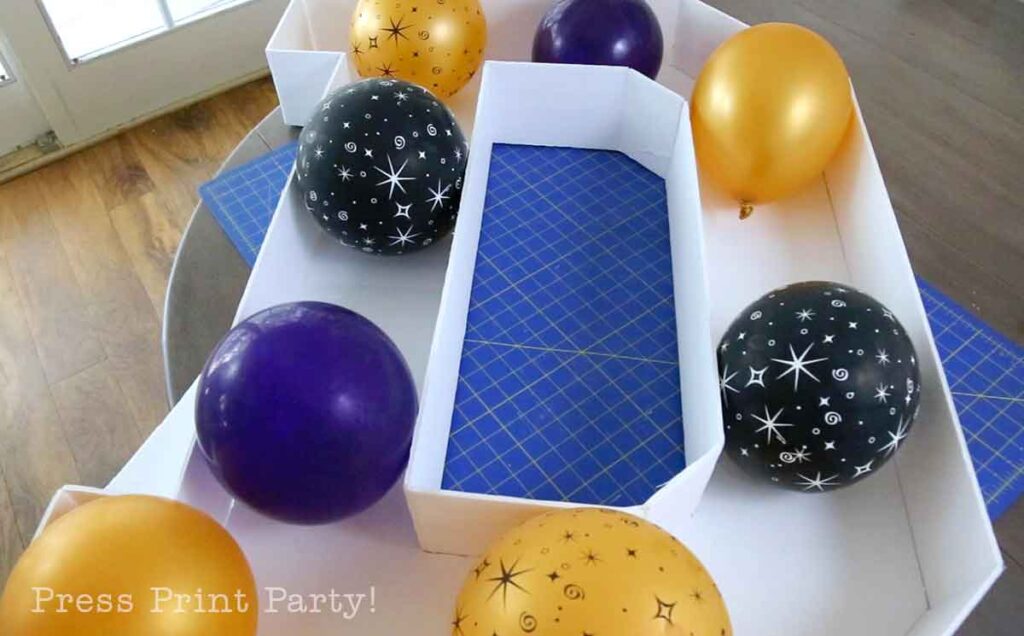
• Then place smaller balloons in all kinds of sizes to fill in the holes as well as you can.
It’s OK for the balloons to go above the walls of the channel.
You could really make these letters incredible by drilling holes in the back and adding lights to make your own marquee letters.
Here you go. One done. Now only three more to go to make your own GRAD sign.
It truly made a grand entrance for my daughter’s graduation party and provided a fantastic photo background.
Balloon Mosaic Letters and Numbers DIY
Materials
- 5 20"x30" foam boards per letter
- Ruler
- Packaging tape
- Scotch tape
- Rotary cutter (optional)
- Exacto knife
- Hot glue gun
- Pencil
- Balloons in various colors and sizes
- A large printout of your letter 40” tall
Instructions
Make The Foam Letter
- Cut 5” long strips out of 2 of the foam boards making 8 strips. You may need a little more depending on the letter.
- With the packaging tape, tape 2 of the boards together on the long side, making a large 40”x30” board.

- Print the desired large letter. The letter can be printed on several pieces of paper using the “Poster” option when opened in the FREE Adobe Acrobat Reader and setting the overlap to “0”.

- Arrange the printout of the letter over the large 40“x30” foam board. Tape the printouts together forming the letter. The top and bottom edges of the print should be on the edges of the foam board. The letters in this file are 40“ tall when printed at 100%.Since you set the overlap to 0, the edges of the printed letters will butt to each other. So all you have to do is overlap the margins of the paper.
- With the letter pattern on top, trim the foam board on the lines with a ruler and rotary cutter or exacto knife. All the letters and numbers in this set have straight edges.
- Remove the paper.
- Mark and cut all the 5” strips to go around the inside and outside of the letter. Whenever possible, score the strip to fold it around the pattern instead of cutting it

- Glue the strips to the letter body with a hot glue gun by placing the glue on the edges of the 5” strips and gluing to the sides of the letter.
- Glue the corner edges of the strips with hot glue and reinforce them with some scotch tape. Try to keep the tape on the balloon side of the channel.

- With an extra foam board or remnants, make a couple of triangle braces to glue on the back of the letter for stability.

Fill Your Letter with Balloons
- Fill your letter with balloons. Inflate your balloons only as wide as the channel, but no more. They should still feel soft to the touch. Otherwise, you risk deforming your channel. A hot glue gun set on low temperature or glue dots work perfect. Then place smaller balloons in all kinds of sizes to fill in the holes as well as you can. I made large and medium size balloons with 12" balloons and smaller balloons with 5" balloons. It’s OK for the balloons to go above the walls of the channel.


You’ll also love:
Some FAQs about Balloon Mosaics
How long do balloon mosaics last?
Since all the balloons are air-filled, a balloon mosaic can last several days indoors. Make sure to securely knot all your balloons. Outside, a balloon mosaic will last the day of the party with no problems. If you’re making it ahead of time, keep it indoors until the day of the party.
How many balloons do I need?
This will vary widely on the size of your letter or number and on how many bigger balloons you use. Get more than you think you need. Getting an extra pack of 5″ balloons is recommended.
How big should my balloons be?
It’s nice to have some big balloons for effect and lots of littles to fill in the holes. That may mean buying different size balloons. I like to have 12″ and 5″ balloons on hand. If you want to end up with a small-sized balloon it works better to start with small balloons, rather than larger balloons that are only slightly inflated.
How do I keep my letters from falling down?
Making braces on the back of the letters will help the letter stay upright. However, outside I’d recommend adding small weights at the bottom of the letter or securing them to something with fishing line. You could also glue your letter or number onto a base. This would be the best method for the number 4 which only has one leg.
What do I do with the large letter and number when I’m done?
I’m keeping my GRAD letters in the attic until my youngest daughter graduates.
But after that, I plan to sell or give them away on Facebook for others to use.
Well, now that you know how easy these balloon mosaic letters and numbers are to make, I’m sure all your parties will include them!
If you want to learn how to make more party decorations, I’d encourage you to learn how to make simple balloon garlands which are fantastic to use for nearly any party.
A colorful balloon garland can really make a baby shower or a bridal shower pop.
I also have a great tutorial on how to make tissue paper garlands and how to set up your dessert table like a pro.
Don’t forget to pin this balloon mosaic letters tutorial:
Get Your Freebie:
If you’ve already subscribed, you can get the password from the bottom of any email I send and go directly to the Free Downloads Library.


How do I find the free downloadable numbers? I clicked on the link where you enter the password but it’s not an option in Orange on the right to download. I did a search and it takes me back to the link where it sends you the email.
The download is in the library under the “School” tab.
This is a great idea. The ones you can have custom made can be so expensive! This post will be a feature this week. #HomeMattersParty
WOW! What a stunning idea. Congrats to your grad, and featuring when my link party opens!
Thank you so much!
Do you have a video showing how to do numbers? I recently downloaded the number 3 from you. I’m a little confused on how to build it. Thanks for any help.