Party Eats, Appetizers
Make a Beautiful DIY Charcuterie Board, Ideas & Step by Step Instructions
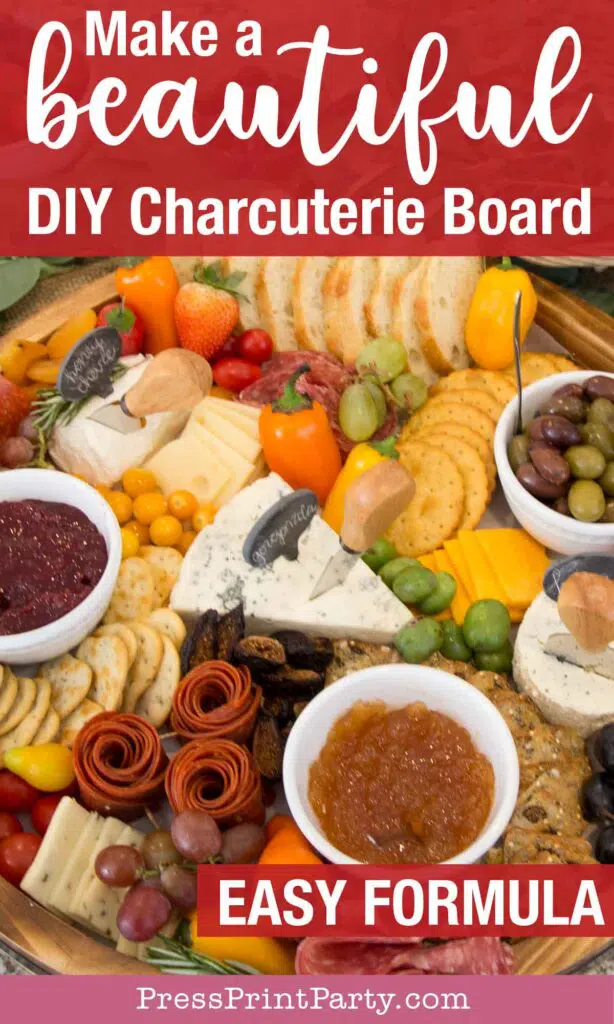
Charcuterie boards are so elegant and pretty to look at, they’re a perfect appetizer platter for a bridal shower, baby shower, adult birthday party, wedding, or any special occasion.
It’s actually pretty easy to make a beautiful DIY charcuterie board and your guests will love it.
I hope to dispel your fears about making your first homemade charcuterie board and give you a winning formula for making it special and inviting.
This post may contain affiliate links.
First I wanted to answer some common questions about charcuterie, and then I’ll move on to ingredients and tips on how to make your DIY charcuterie board stunning.
| Contents |
|---|
What does Charcuterie mean?
Charcuterie is a French word that refers to a variety of cured meats mostly made out of pork. It can refer to salamis, hams, pates, and such.
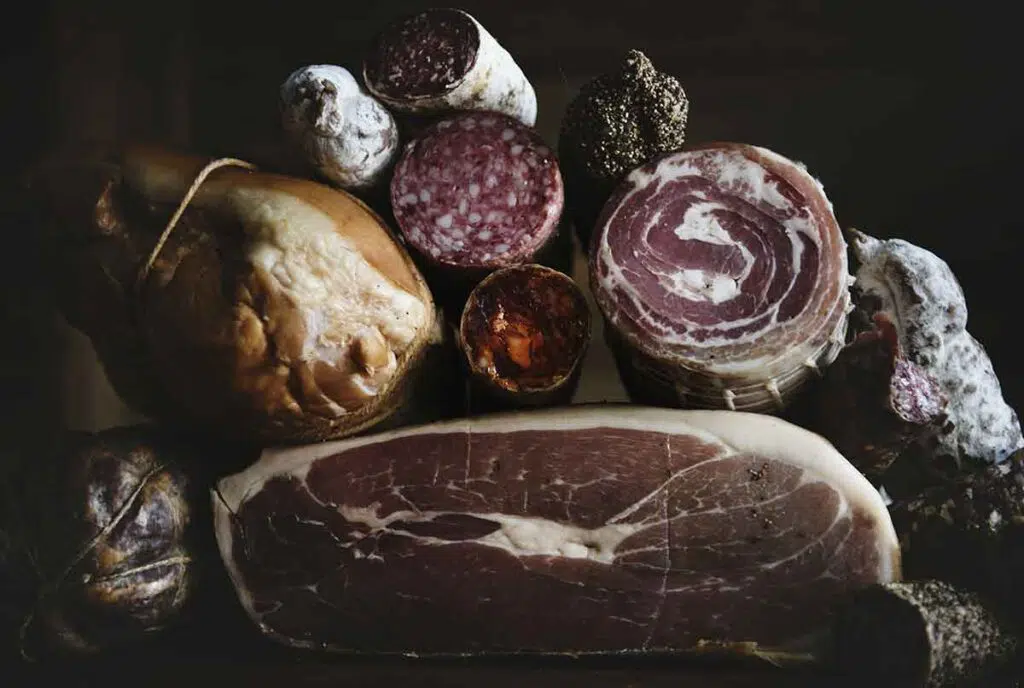
Typically, in the U.S. a charcuterie board refers to a platter with an assortment of meats, cheeses, crackers, bread, and pickled items.
I’m going to be a purist here and say that to be a classic charcuterie board, the platter MUST have cured meats. It’s not just a cheese board.
I have a funny story about that. When planning a baby shower a friend of mine said she would bring a charcuterie board. When she came and set it up, it was all veggies and dips. When I asked where the meat was, she said she made a vegetarian charcuterie board. Sadly, I had to explain to her that there is no such thing, that what she brought was actually a veggie platter.
Unfortunately, there is no good charcuterie board without charcuterie.
I know, I know, I’ve seen plenty of candy charcuterie boards (very cute ones too) and I get the use of the term. But technically it’s not correct.
How to pronounce charcuterie in French and English
Since I’m a French girl living in the U.S I thought I’d record myself pronouncing the word “charcuterie”, both the way the Americans say it and the way it’s actually pronounced in French.
The basic difference is the “u” sound. Since English speakers can’t really pronounce the French “u” the “cu” is pronounced more like “cue”.
Pronouncing Charcuterie in English:
Pronouncing Charcuterie in French:
How much does a DIY charcuterie board cost?
Yikes, the truth is that they are not inexpensive to make.
There’s this guy on YouTube that shows you a $30 versus a $130 board and he’s pretty entertaining but his $30 board has meats I wouldn’t serve like that.
You’ll probably end up spending between $50 and $100 for a decent board. It all depends where you shop and how many people you’re feeding.
If you’re looking for more budget-friendly options to serve at a party I’d stay away from a charcuterie board and go check out my “Party on a Budget Food Ideas That Don’t Look Cheap” post for plenty of ideas.
Types of boards to use
Typically you’ll see charcuterie boards done on a large wooden board like a pretty cutting board.
I’ve always had trouble with those. Mostly because things tend to fall off and they’re difficult to move once you put them together.
They also make special cheese boards with grooves and a place for cheese knives which are nice but a bit pricey.
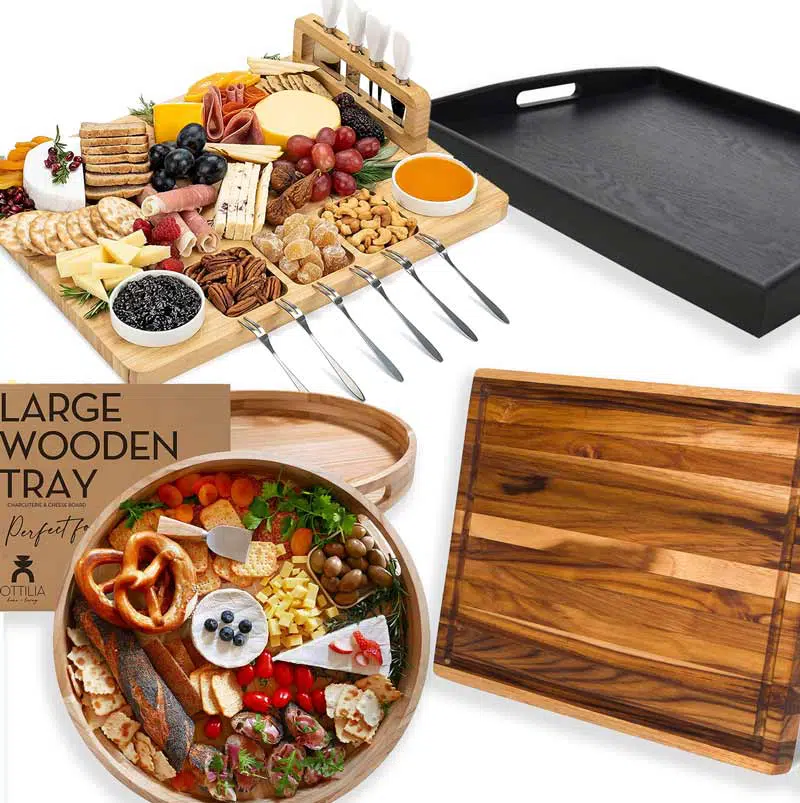
As I don’t have a large board, I was always trying to fit a bunch of things on a smaller wood board. In theory, any finished piece of wood would work but there is a better solution.
When my friend made her charcuterie board in a large rimmed tray I had an epiphany!
A rimmed tray made so much more sense!
With a tray, you’re able to stuff your board and nothing will fall off! And as the host you can carry it from the kitchen to the room it’s going to be served it in without making a mess! And as a guest, you can bring a board without the risk of filling your car’s center console with salami and jam.
It also doesn’t have to be wood. A galvanized tray or even a woven tray will work great as long as it’s large enough (I’d say at around 20″ in diameter).
And it makes such a beautiful charcuterie board!
It will work with round trays or rectangular trays and it’s a great option because most people have a serving tray of some sort at home. I was so happy to find this method because I already own several large trays.
Other things you may need:
- Cheese knives for the soft cheeses
- Cheese markers
- Wooden Picks (for olives, cherry tomatoes, etc)
- Small bowls
- Small spoons for the dips and jams
My easy DIY charcuterie board formula
This formula will help you stay focused when you get to the store and you’re overwhelmed with all the options in front of you.
Once you’ve chosen the described amount of items in a category, just move on to the next category.
For a beautiful charcuterie platter, pleasing to the eye, a good rule of thumb is to plan in 3s and use plenty of different colors.
- 3 soft kinds of cheese to spread
- 3 firm types of cheeses to serve sliced
- 3-4 different types of crackers / sliced baguette
- 3 types of cured meats
- 3 types of fruits (dried fruit or fresh fruit)
- 3 types of veggies/ pickled items
- 2-3 small bowls for jams, dips, or others.
- 1-2 types of nuts
- 1 garnish greenery (rosemary, thyme, oregano, mint)
If you wish, you can add more bowls around the tray for nuts, seeds, olives, chocolates, candy, chocolate-covered raisins or almonds, etc.
You’re now on your way to making an epic charcuterie board.
Charcuterie Board Ingredient ideas
This is by no means an extensive list of charcuterie board ideas. But this should give you an idea of what to look for in the store. Just get what you can find.
What kinds of charcuterie board cheeses to use?
Fancy cheeses can get expensive fast.
When you choose your variety of cheeses, it’s ok to combine cheap and expensive cheeses to save a little money.
This is by no means an extensive list of the best cheeses you can use but they are commonly found in U.S. grocery stores. Trader Joe’s is a great place to go for all kinds of cheeses, but so are Aldi and Whole Foods.
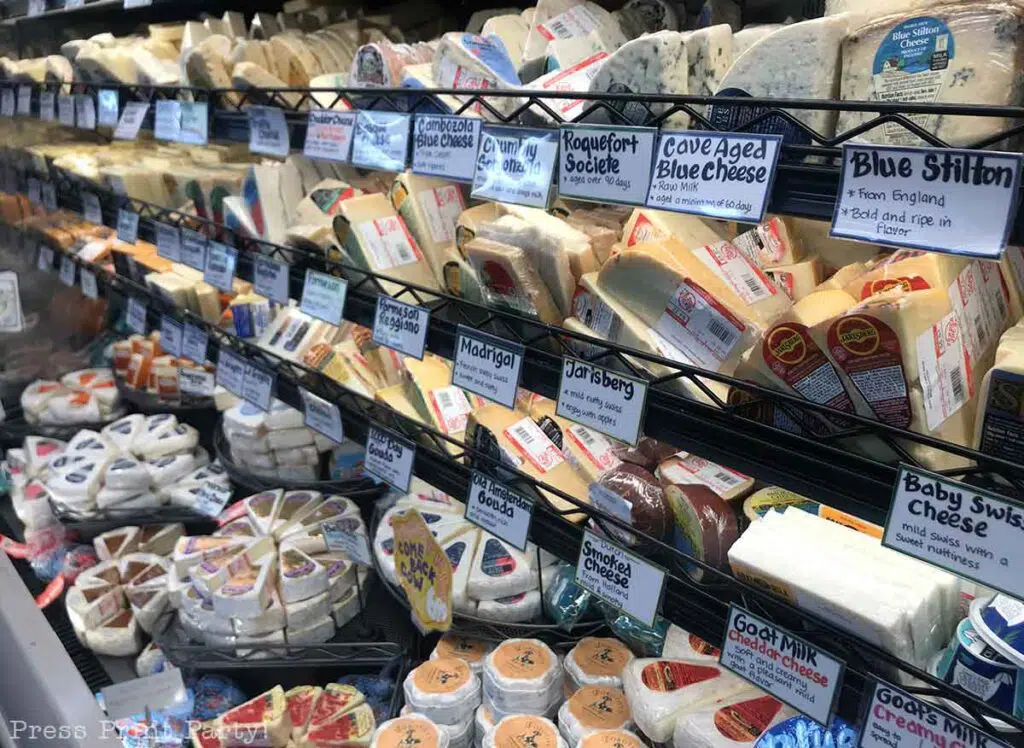
Types of Soft cheese to use:
- Brie
- Camembert
- Goat cheese (Those come in a wide variety)
- Cream cheese with a spicy jam on top (inexpensive)
- Blue Cheese
- Mozzarella
- Boursin
Types of Hard cheeses to serve sliced
- Havarti
- Aged Gouda
- Swiss
- Sharp cheddar
- Jack
- Pepper Jack
You could also sprinkle in some Babybel cheese, still in its red wrapper, for a splash of color. If there are kids at the party, these will be the first to disappear!
Also, if you have the time, you could cut your firm cheese slices into different shapes with mini cookie cutters. It’s a great way to make the inexpensive cheeses a little snazzier.
Which charcuterie meats to use?
The best meats to use are cured meats. They are drier to the touch and easy to pick up.
- Salamis (You can find all kinds of salamis, from regular to spicy to peppered)
- Prosciutto
- Summer sausage
- Pate or braunschweiger (if you can find it- Serve it as you would a soft cheese)
I’d stay away from deli meats, especially in the U.S where they’re all injected with water. But if the budget is a consideration, I recommend getting it sliced at the deli counter instead of buying it in a pack.
Fruits to use
- Anything small that can be grabbed easily, cleanly, or with a pick. That includes
- Grapes (Black, green, and red)
- Strawberries (have fun with them and transform them into flowers)
- Blackberries or Raspberries if not too soft.
- Gooseberries
- Fresh Figs
- Dried fruit like figs, apricots, prunes, or mango.
- Cherries
Veggies to use
Keep in mind that you’re not making a veggie tray. Although I’d stay away from the typical carrot and celery sticks you could make them work on a charcuterie board.
However, I think It’s best to use small veggies as fillers, not the main attraction:
- Little sweet peppers
- Little pickles (like cornichons)
- Cherry tomatoes
- Pickled Olives (I know it’s technically a fruit)
- Picked onions
- Pickled beets
- Radish
- Green onions
Nuts to use
- Pistachios (don’t forget to provide an empty bowl on the side for shells)
- Chocolate covered nuts like almonds
- Salted peanuts (inexpensive)
- Seeds (pumpkin)
- Pecans
- Walnuts
How to put an easy charcuterie board together
First, line your tray with parchment paper making sure to nicely trim it just around the bottom.
If you’re using a large wooden board you can use small parchment paper pieces just under the soft cheese to protect the board.
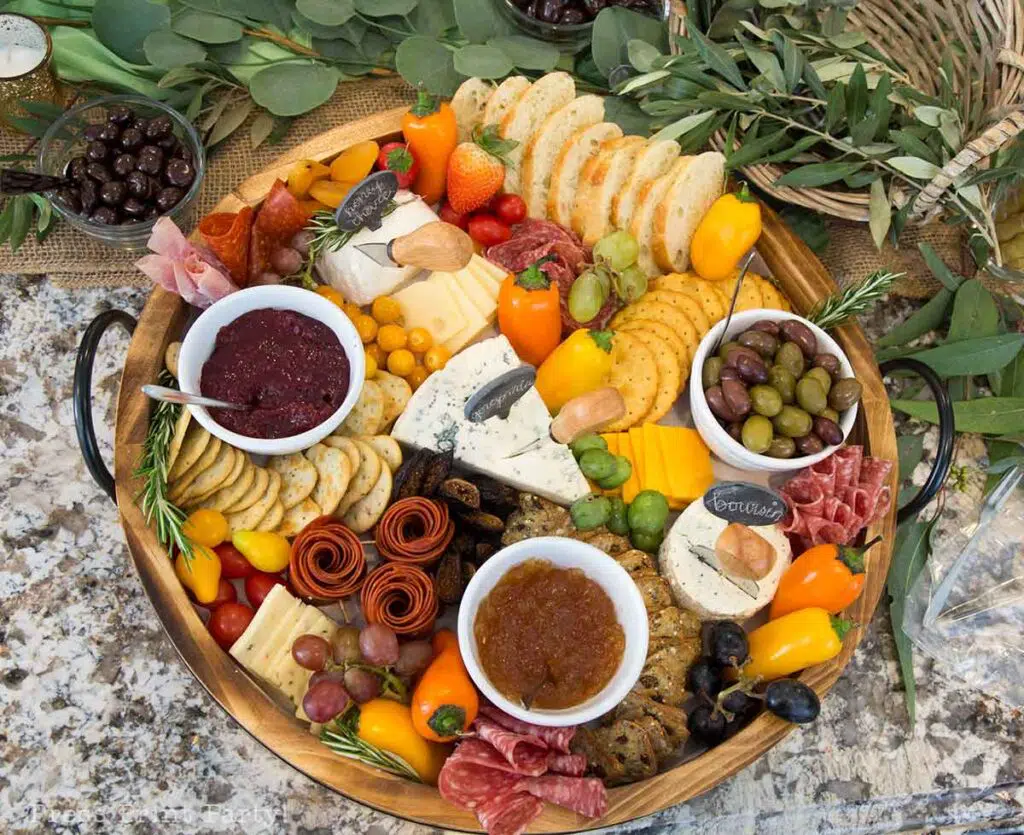
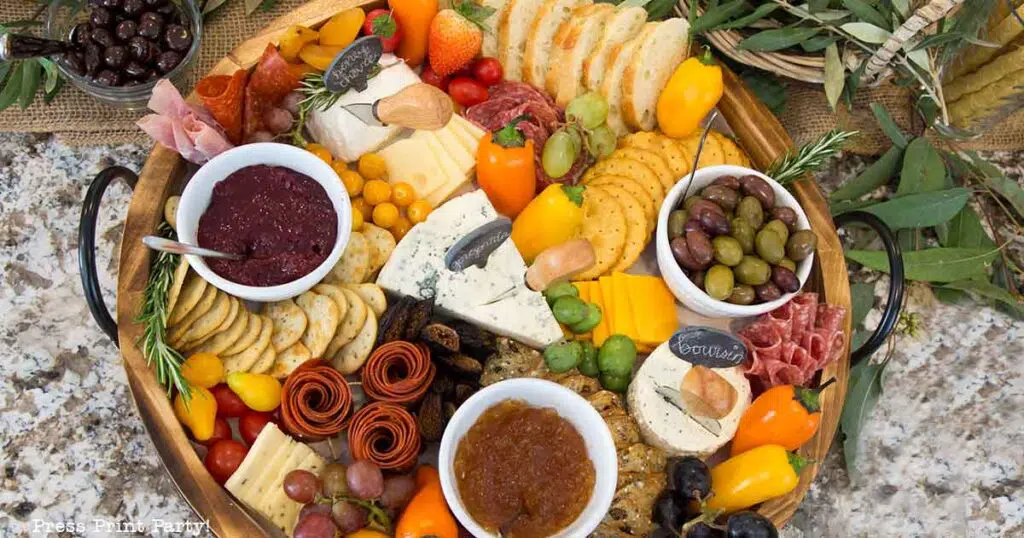
Then fill your tray in this approximate order distributing the items evenly around the board.
- Bowls with jelly, fruit spread, hummus, or dips
- Soft cheeses
- Slices of hard cheese
- Cured Meats
- Crackers/ bread around the meat/cheese/bowls
- Fruits, veggies, and nuts in the gaps
- Fresh herbs
Don’t put all the meats or all the cheeses in one area. The goal here is to spread the joy.
Display your meats in interesting ways so they’re easy to pick up. Learn how to make a beautiful salami rose and 4 ways to display your charcuterie meat. It’s super easy, trust me.
Fan cheese slices and crackers in small clusters.
Use the fruits, veggies, and nuts to try to fill in ALL the gaps.
Don’t forget to use some rosemary or some other fresh herb to fill in any empty space.
Use the photos as a guide and print the charcuterie board formula below.
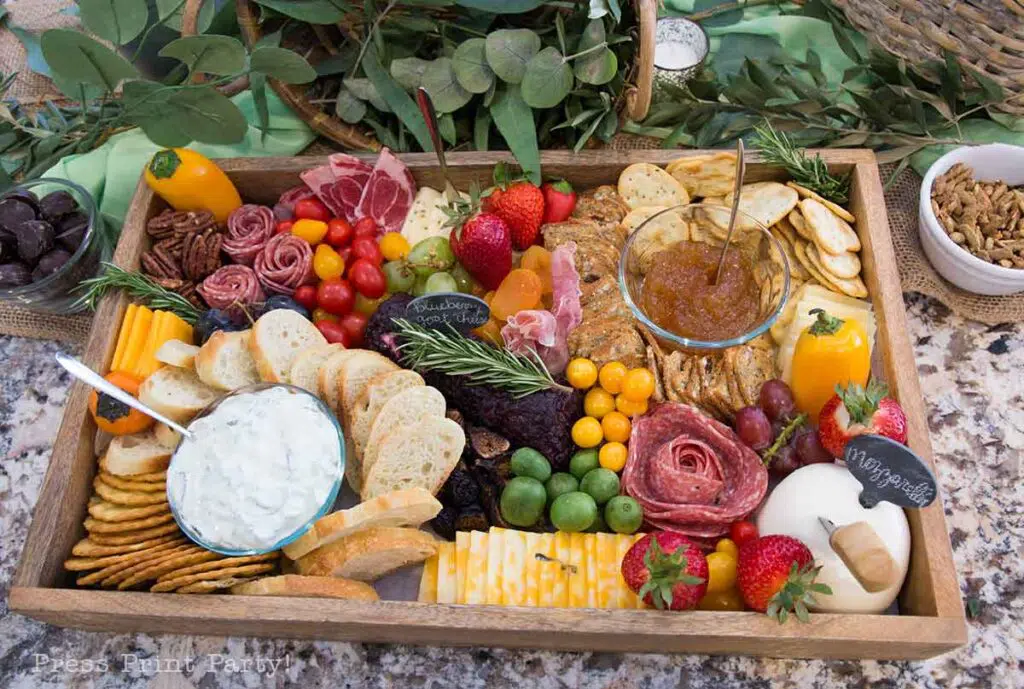
The beauty of using a tray is that you’ll be able to fill in all the gaps without anything falling out and make a much more beautiful display.
And the salami rose is surprisingly easy to make. I also have a tutorial with 4 ways to fold your charcuterie meats so that they’re easily grabbed by your guests.
You can now reveal your perfect charcuterie board for your guests to enjoy.
And because you made it on a tray, you can make it in the kitchen and move it easily to the table without the risk of a catastrophe.
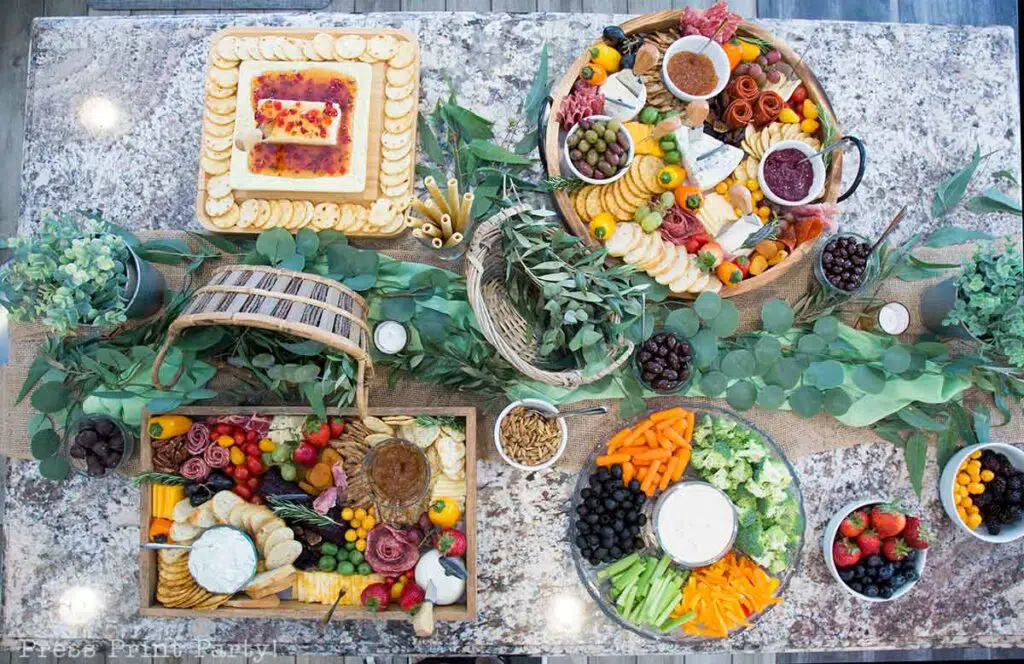
Your DIY charcuterie board will last at room temperature for hours. So no need to worry about refrigeration or things going bad during the party.
I hope you enjoyed my simple charcuterie board ideas. I have lots more appetizer ideas, party food tips, and party ideas on the blog as well as a printable party planner to keep you on track for all those parties.
Charcuterie Board Formula
Ingredients
- 3 types of soft cheeses for guests to spread on crackers
- 3 types firm cheeses to serve sliced
- 3 types of cured meats salamis, cured hams, summer sausage
- 3 types of crakers
- 1 sliced baguette
- 3 types of fruits fresh and/or dried
- 3 types of veggies / pickled items
- 1-3 types of nuts / seeds
- 2-3 dips and/ or jams
- 1 garnish greenery rosemary, thyme, mint, etc
Instructions
-
Disperse the small bowls on your tray or board and fill them with the jams/ dips.
-
Place the soft cheeses on parchment paper around your board
-
Cut the firm cheeses into slices and arrange them around the board in small clusters
-
Fold the meats into interesting shapes that are easy to grab and display them in groups around the board
-
Fan the crackers and sliced baguette around the bowls, cheese, and meats.
-
Place the fruits/ veggies/ nuts in the gaps around the board
-
Fill the remaining small gaps with greenery
-
Add the cheese knives, labels, and spoons
Don’t forget to pin it:







This is by far the best and most helpful about a charcuterie board I come across! Thank you so much. Greetings and wishing you and your family all the best in the new year and a warm Christmas from The Netherlands
Awww! Thank you. I’m happy it was helpful.